Link Click Tracking in GA4 using GTM: Step by Step
Roy Bielewicz
Track button or link clicks to better understand user behavior.
In today's digital age, businesses need to stay ahead of the curve when it comes to understanding their customers' online behavior. One of the most important aspects of this is tracking how users interact with the links on their website. By doing this, companies can gain valuable insights into their customers' interests, habits, and preferences. In this blog post, we'll explore how to set up link click tracking using Google Tag Manager and Google Analytics 4. We'll provide a step-by-step guide to help you get started and explain the benefits of this powerful tool. So if you're looking to take your online marketing strategy to the next level, read on!
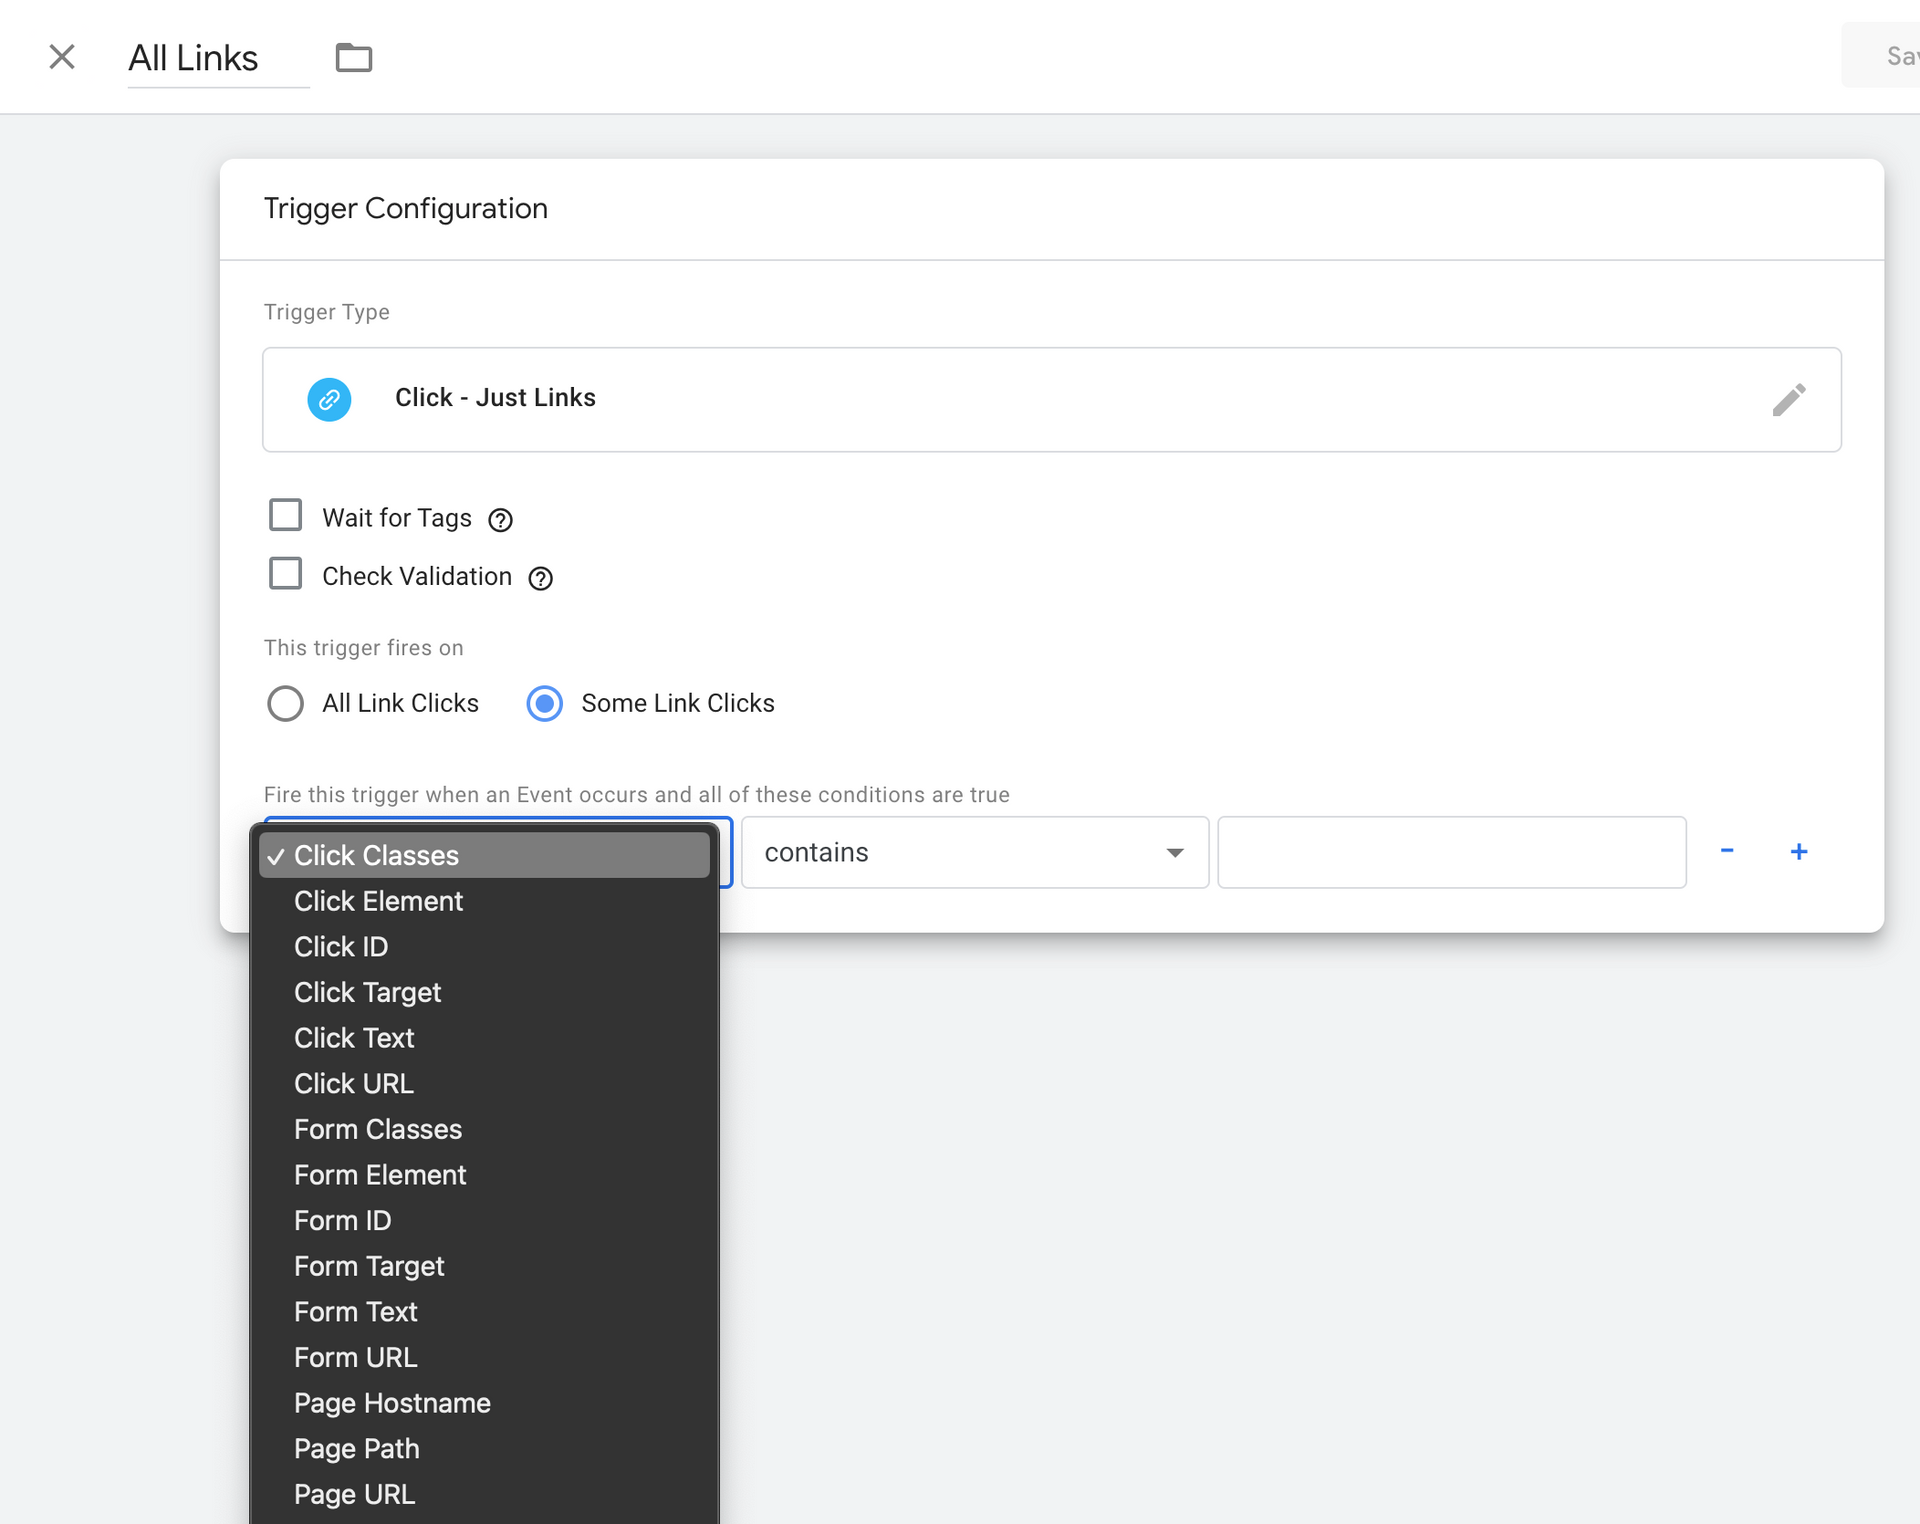
1) Setup All Clicks Trigger
In order to see what elements your site has that can be used to trigger a tag, you can either look directly in your source code by using the "inspect" in Chrome, or by creating a general trigger that works whenever someone clicks on anything on the site.
If you're using the first method, you'll see code similar to below. You'll want to look at elements of your button or link that can be used to identify that click. These are typically variables like class name, ID, text, etc.
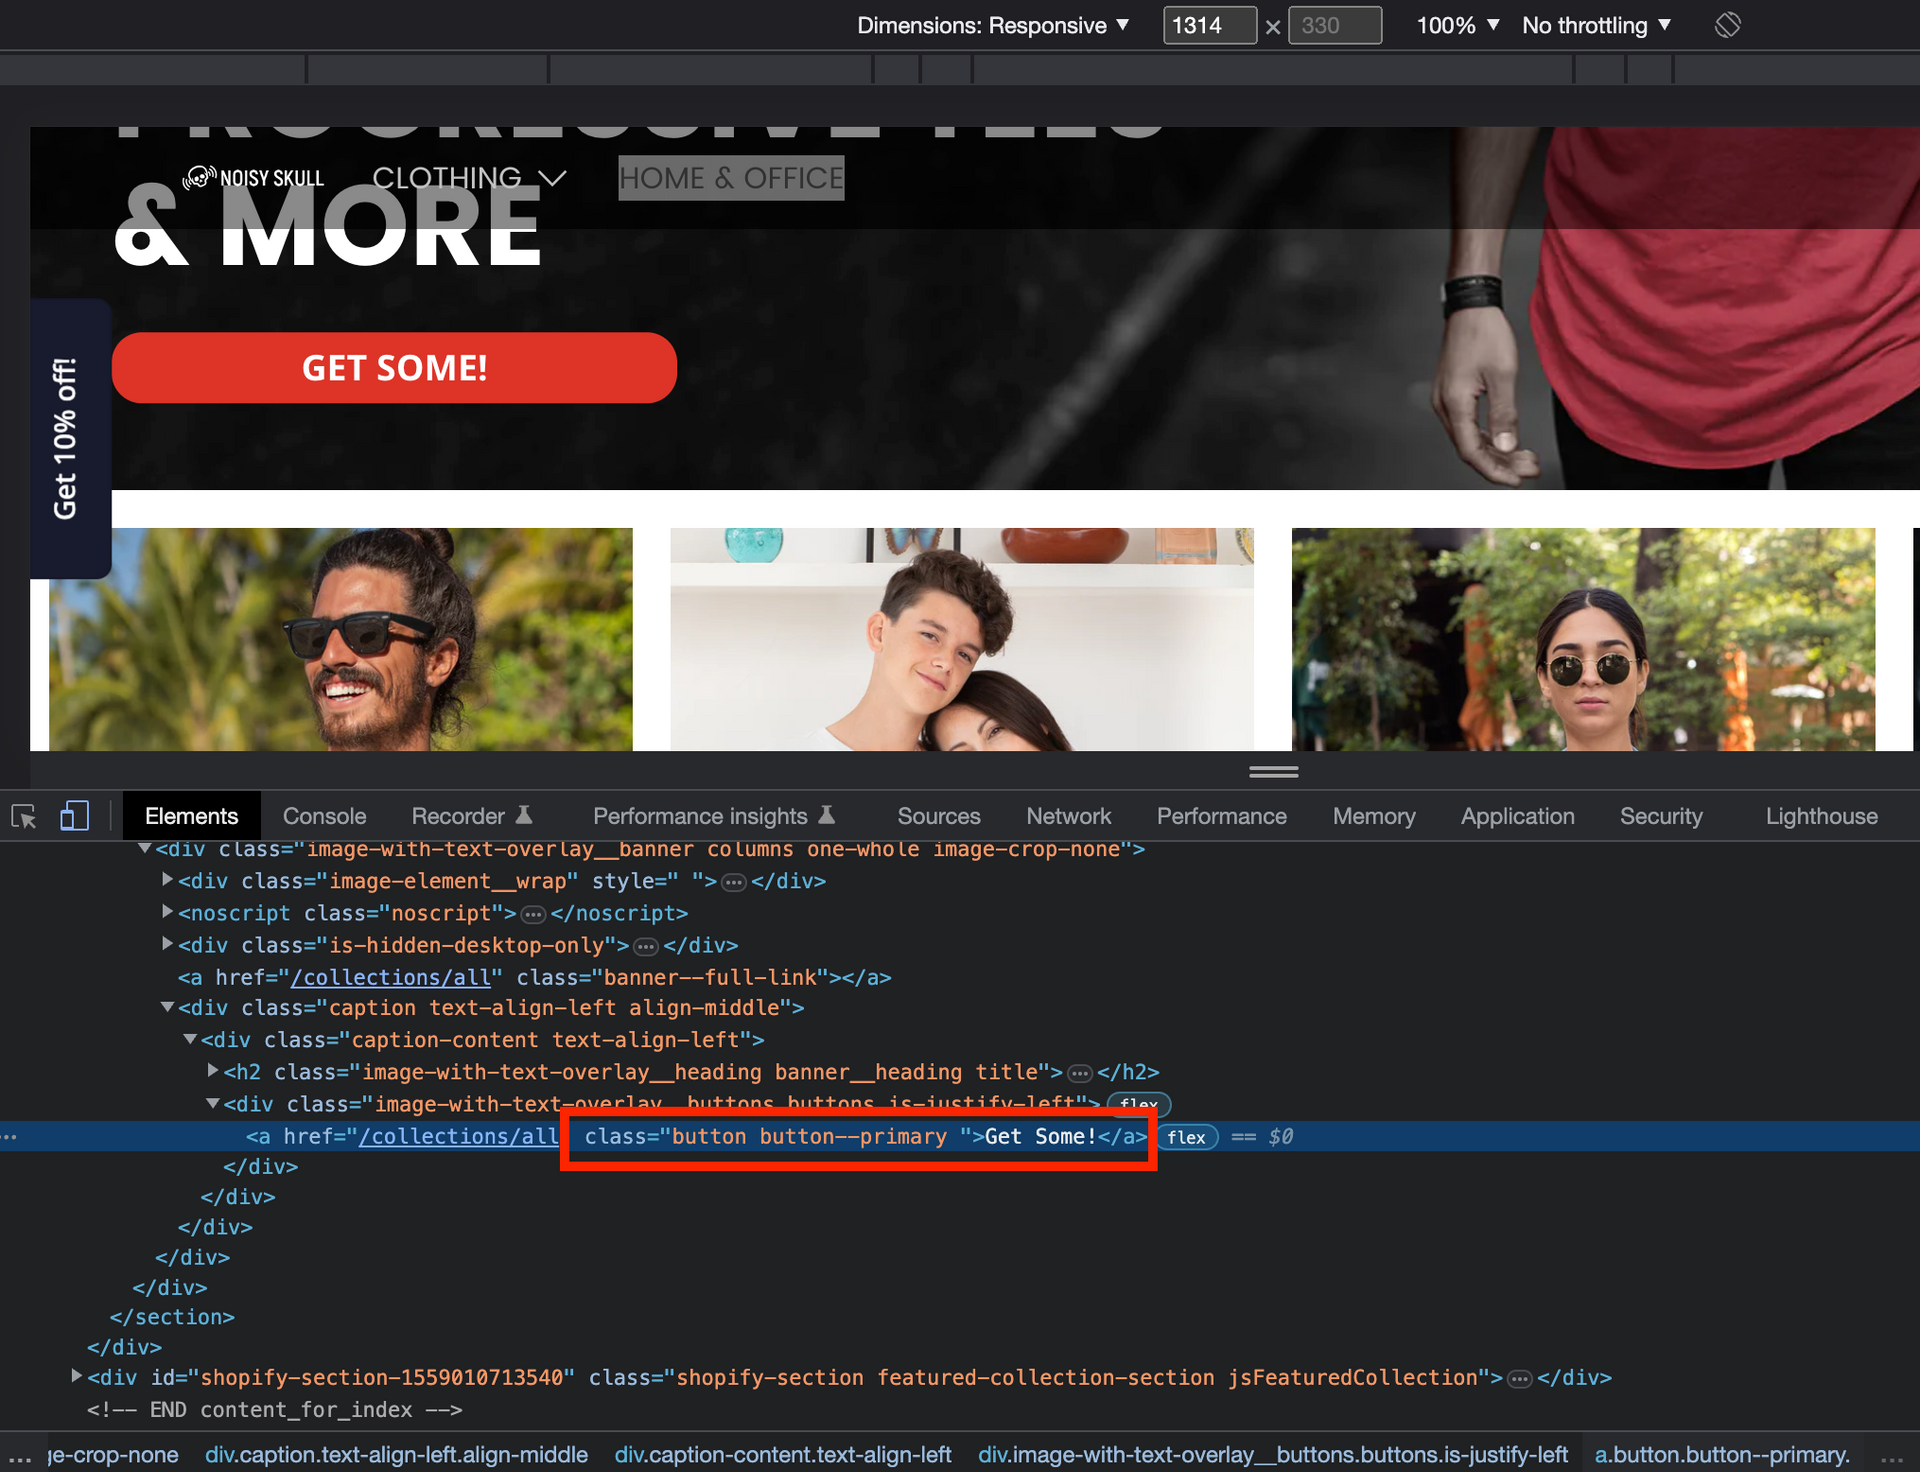
In the screenshot below, we can see that this link (a button in this case) has a class that contains "button", and text that contains "Get Some!". When choosing a trigger, we generally recommend using the class in a case like this, since the text itself may change over time.
If you're not that comfortable looking at HTML, the other approach is the All Clicks trigger.
To set this up, go to your GTM console:
- Click on the Trigger link on the left of your Workspace.
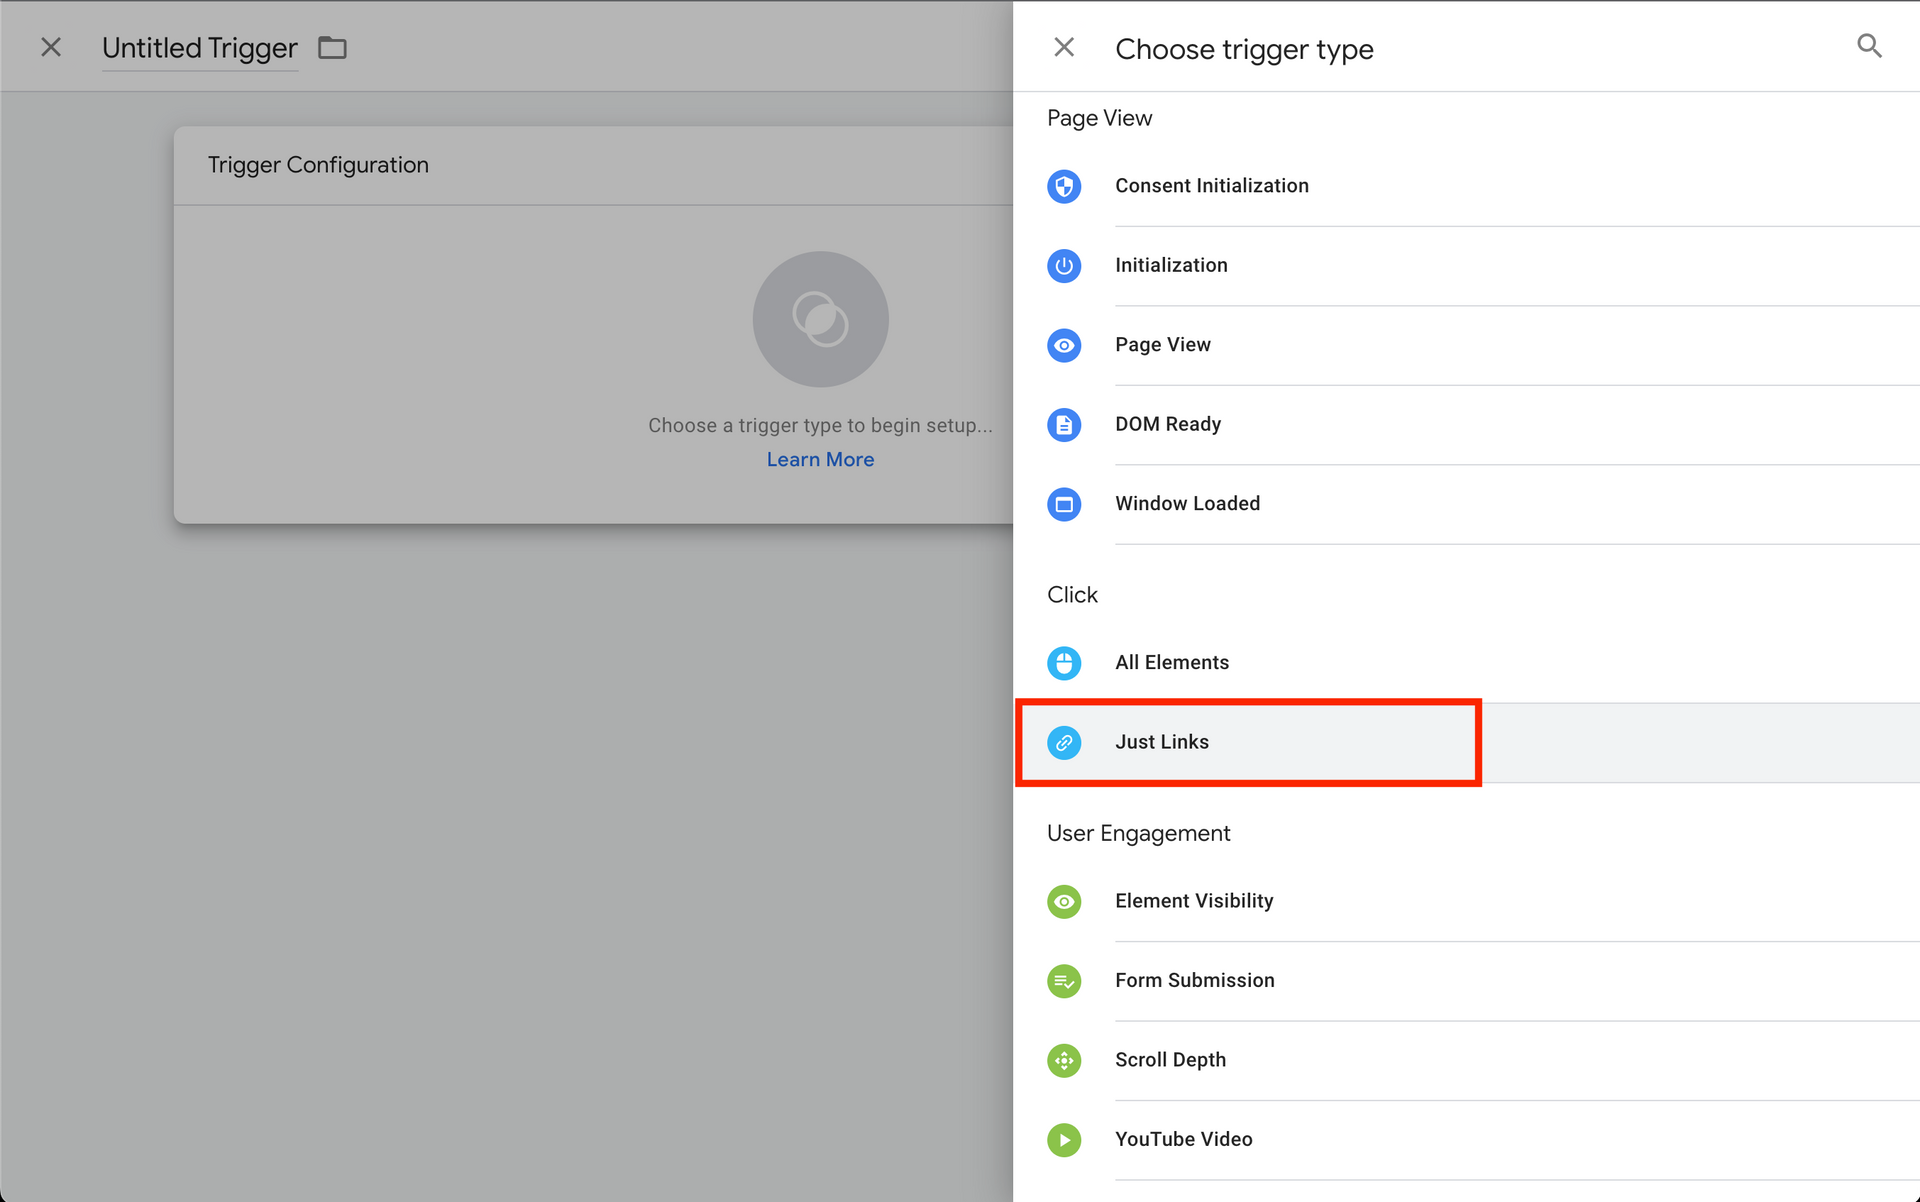
- Click on the "New" button to create your trigger.
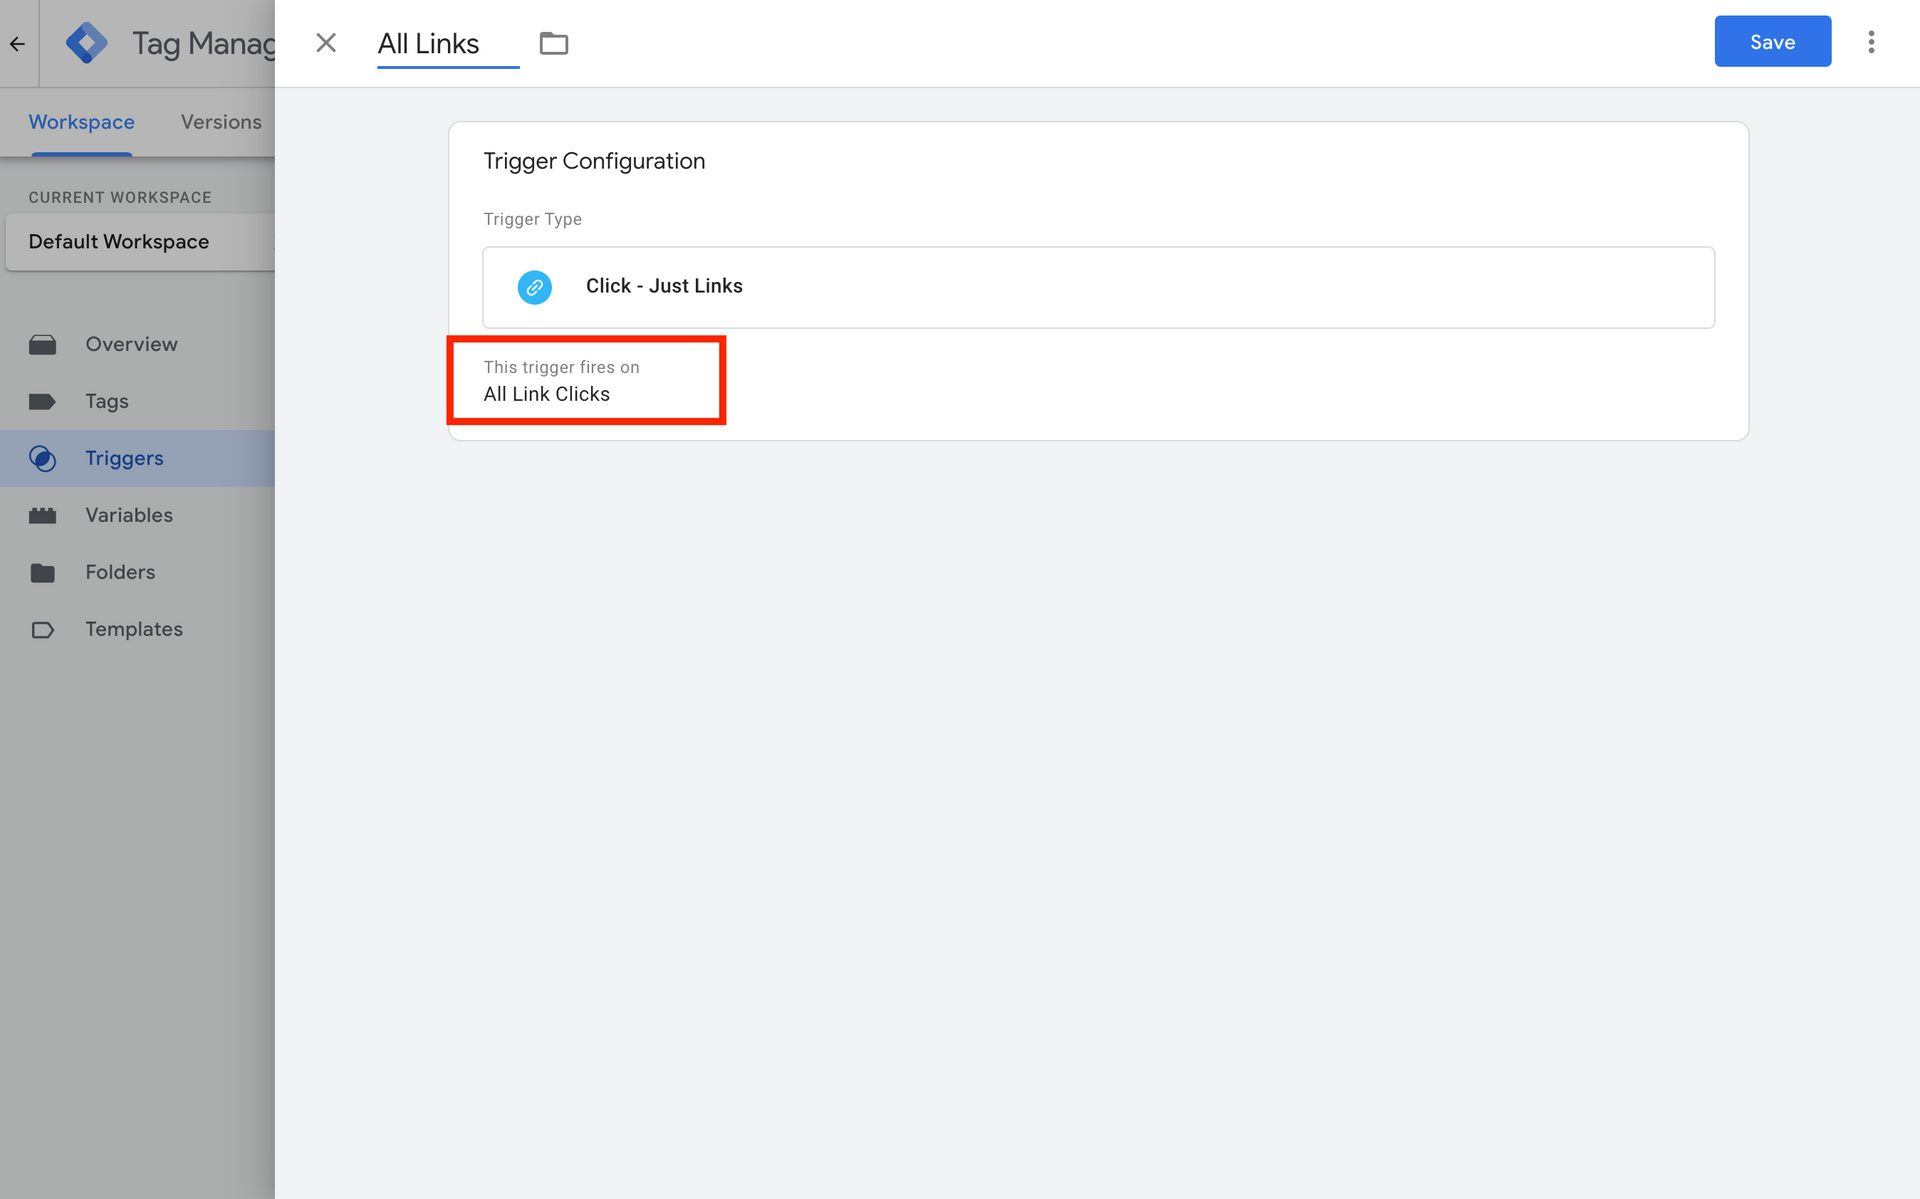
- Select the "Just Links" trigger type.

Once you have selected "Just Links" as the trigger type, you'll click on the "All Link Clicks" radio button.
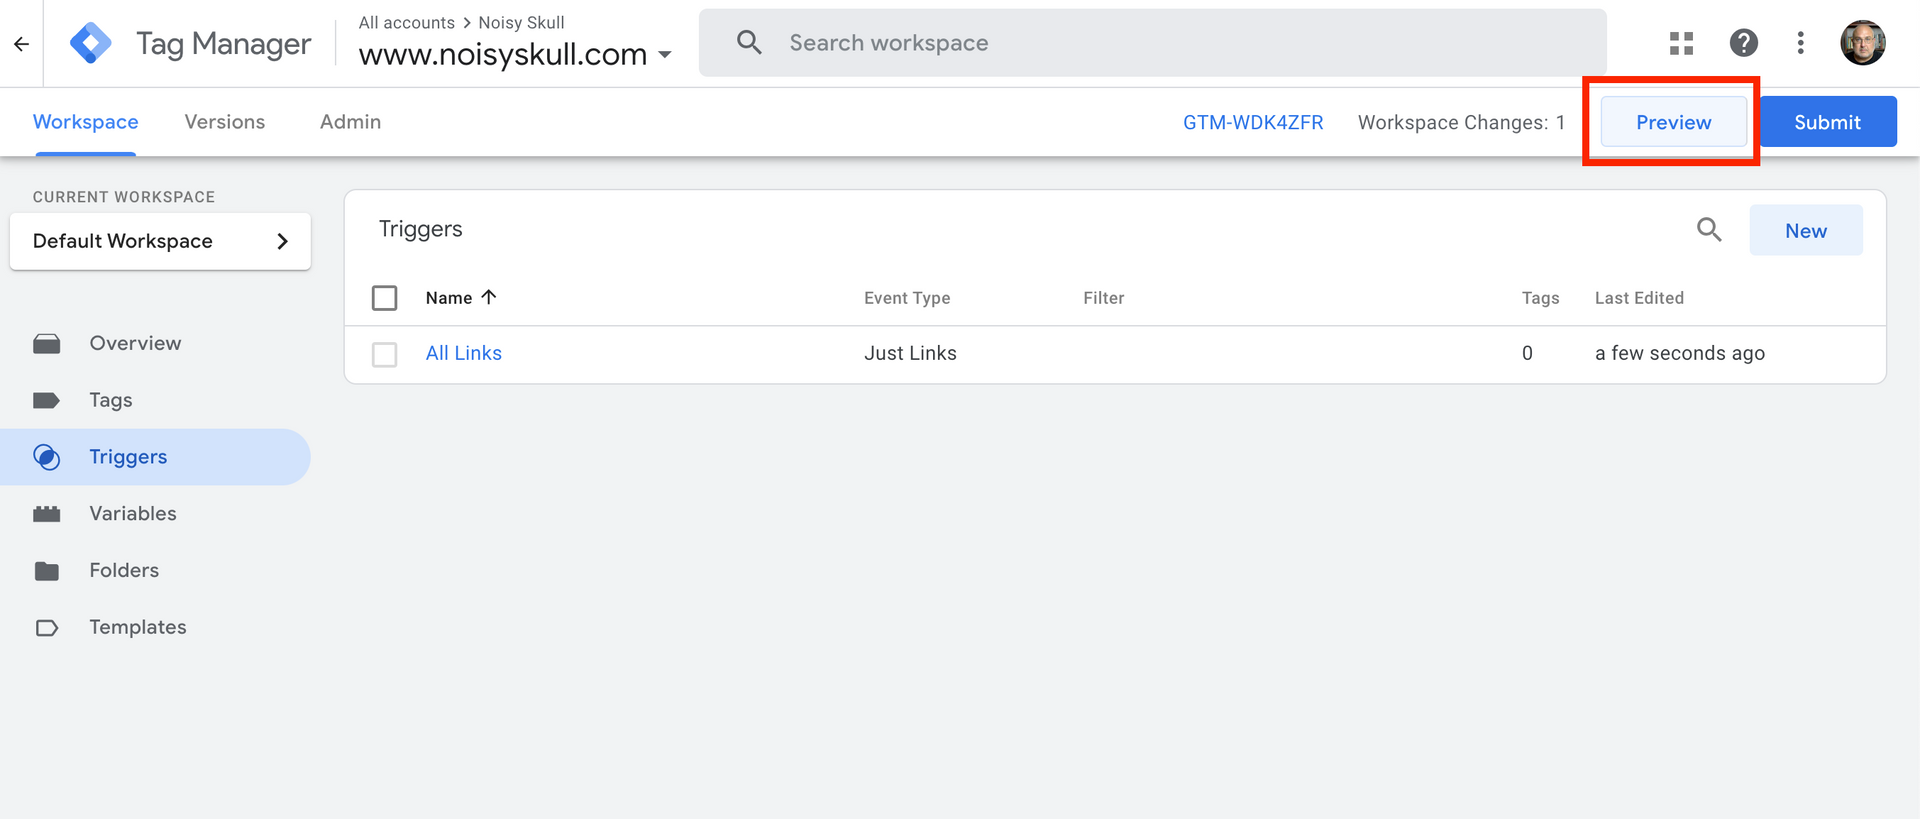
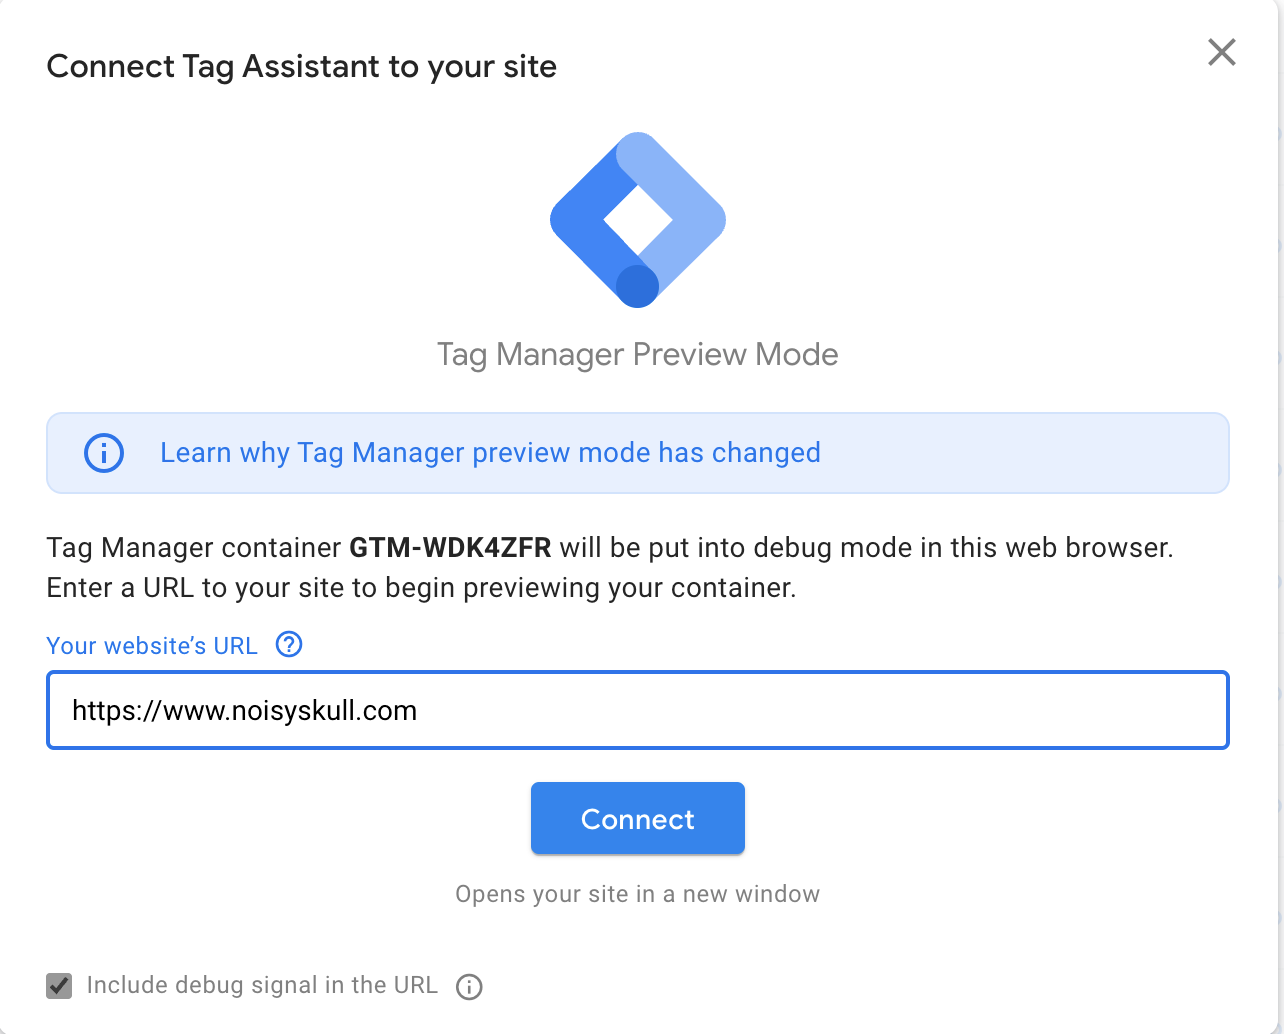
Once this is set, go ahead and save and then publish the new trigger. Once the new trigger is published, click on "Preview" to launch the tag assistant.
The Tag Manager Preview mode will launch a new tab with your site, which is recorded, and as well as the Tag Assistant, which will record your actions on the site.
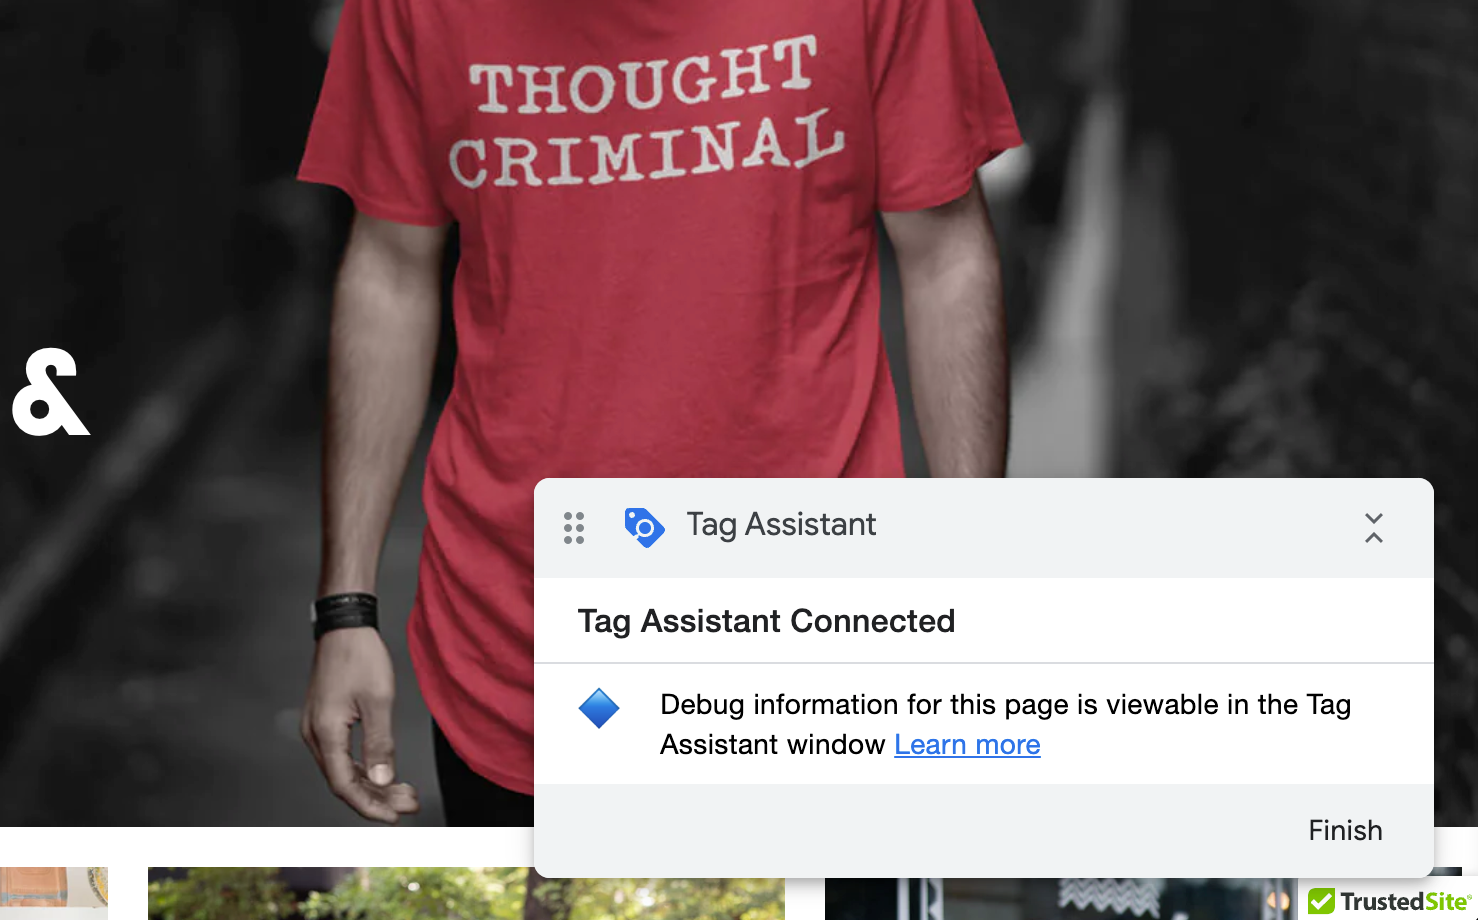
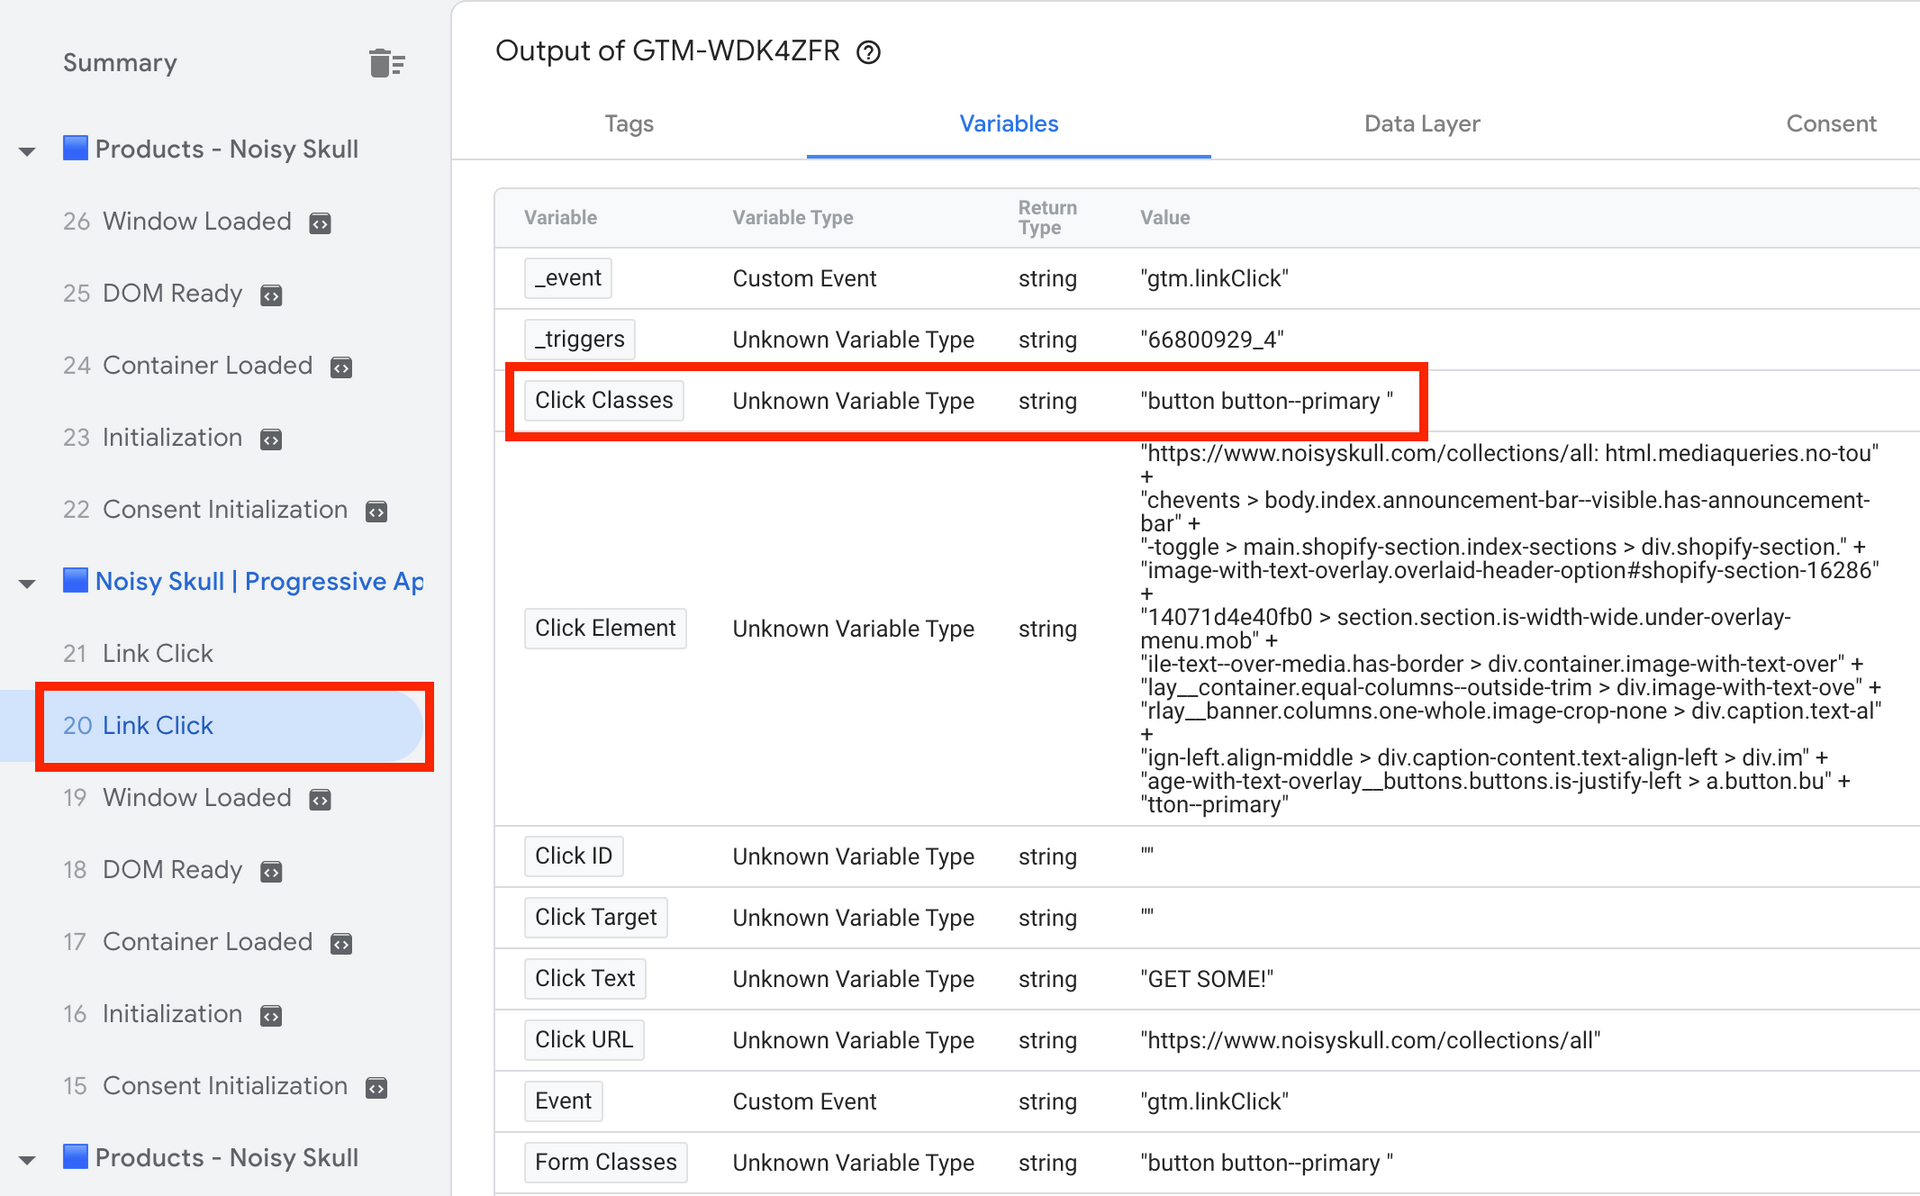
Once the tag assistant is active on your site, click on the link or button that you want to record. This will show you details about the link/button that you will use in your modified trigger and tag to track these links.
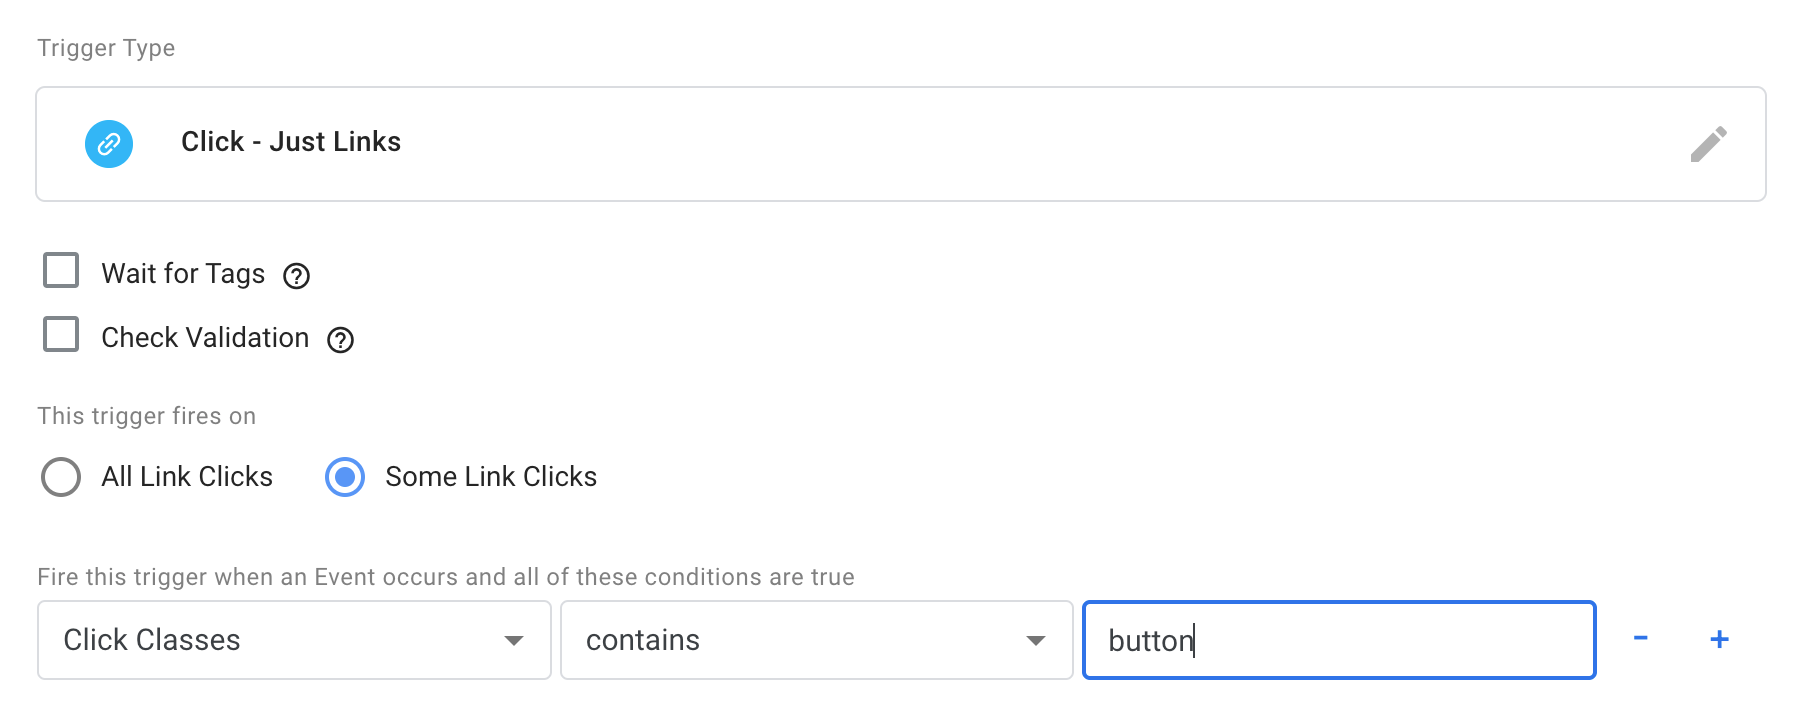
In the example from this site, we can see that the link click has passed a CSS class for the button that contains the words "button button-primary". That's what we'll use to define out trigger for button tracking.
2) Creating the Final New Trigger
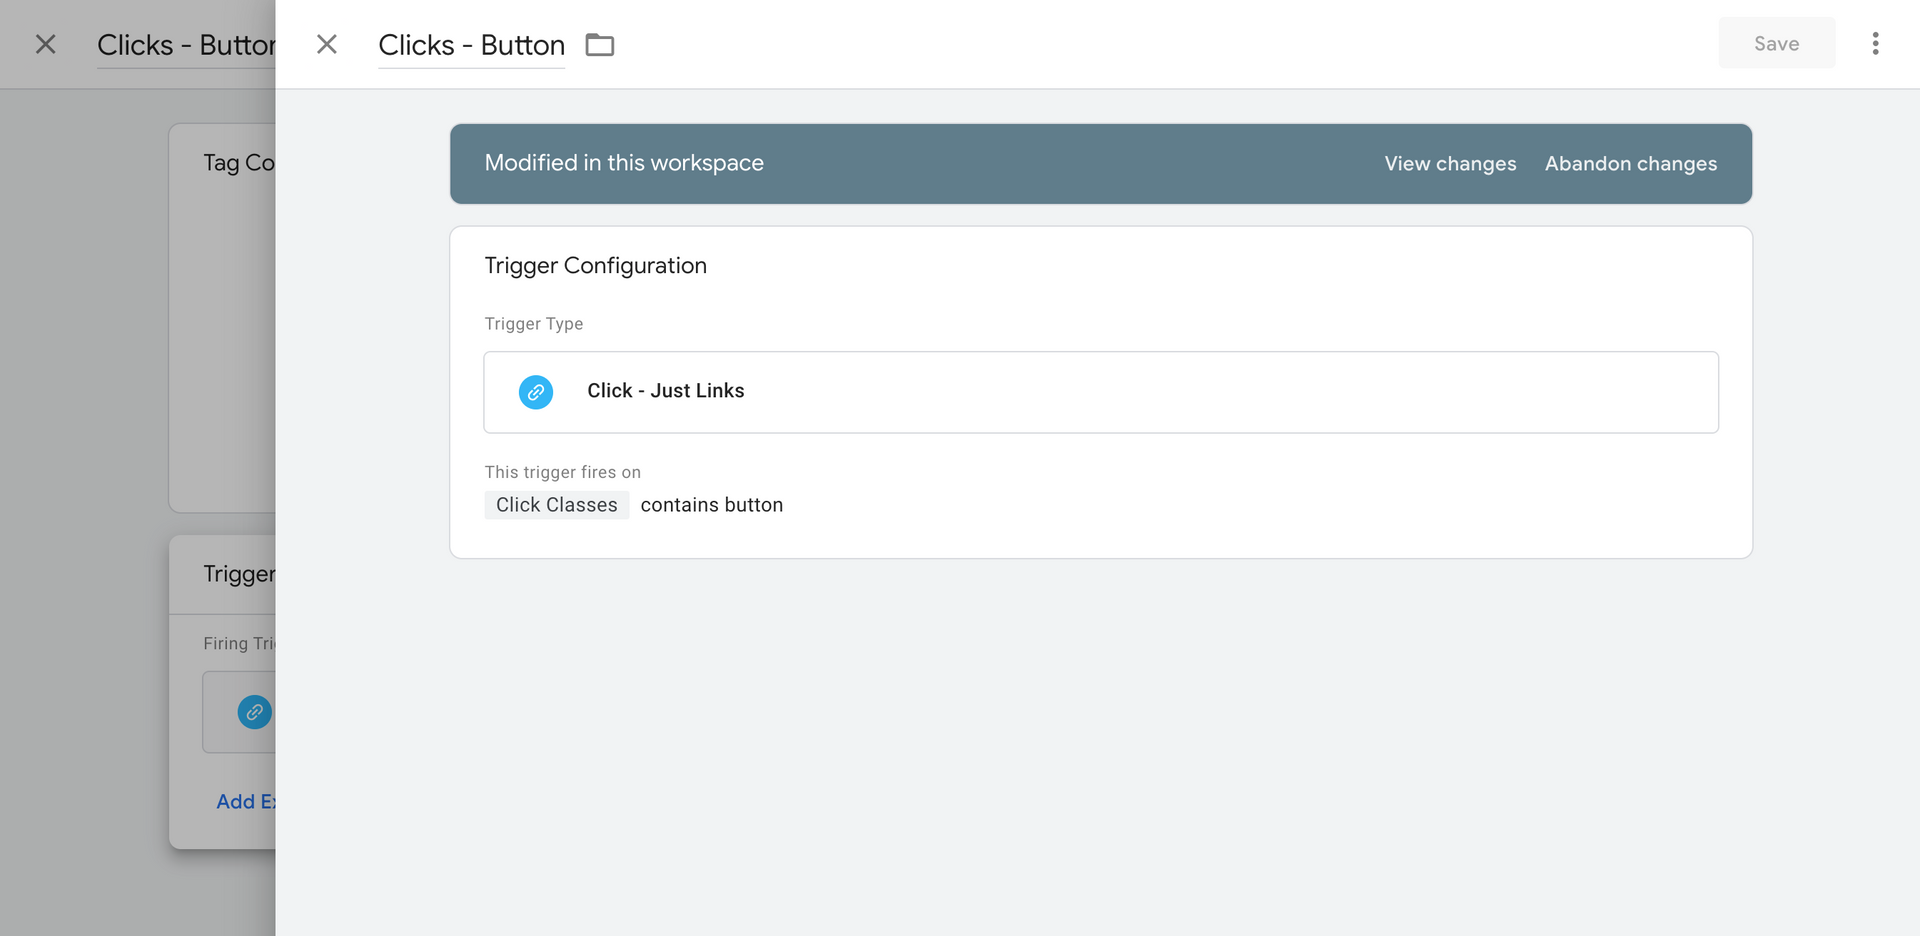
Now that we've used the "All Links" trigger that we set up to see what we can use to identify button clicks, we'll modify the "All Links" trigger to look at the specific links we want.
In this case we'll modify the name of the Trigger, and then change it to "some clicks" rather than all clicks.
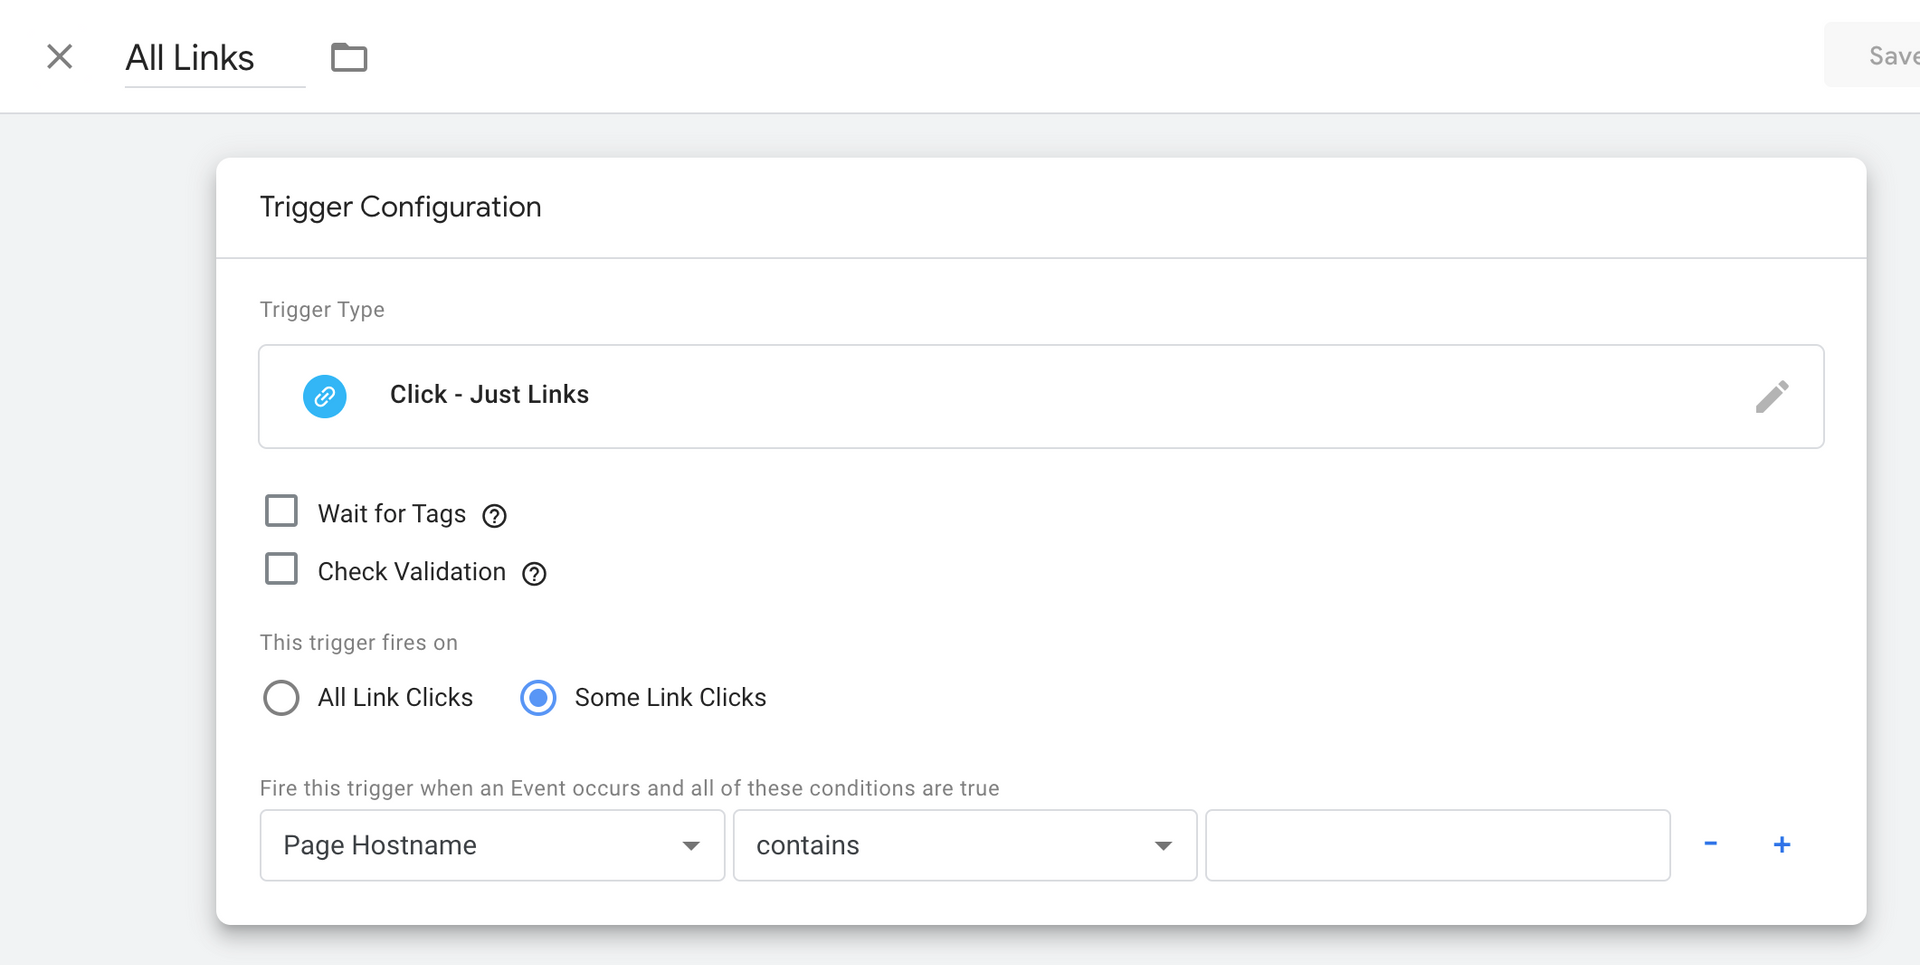
Once you choose some links, now we can change the trigger for the event to Classes and then enter the name of the class (in this case "button") that we saw in the tag assistant.
Once we choose the Click Classes variable, we can choose "contains" and then enter the class variable we identified - "button".
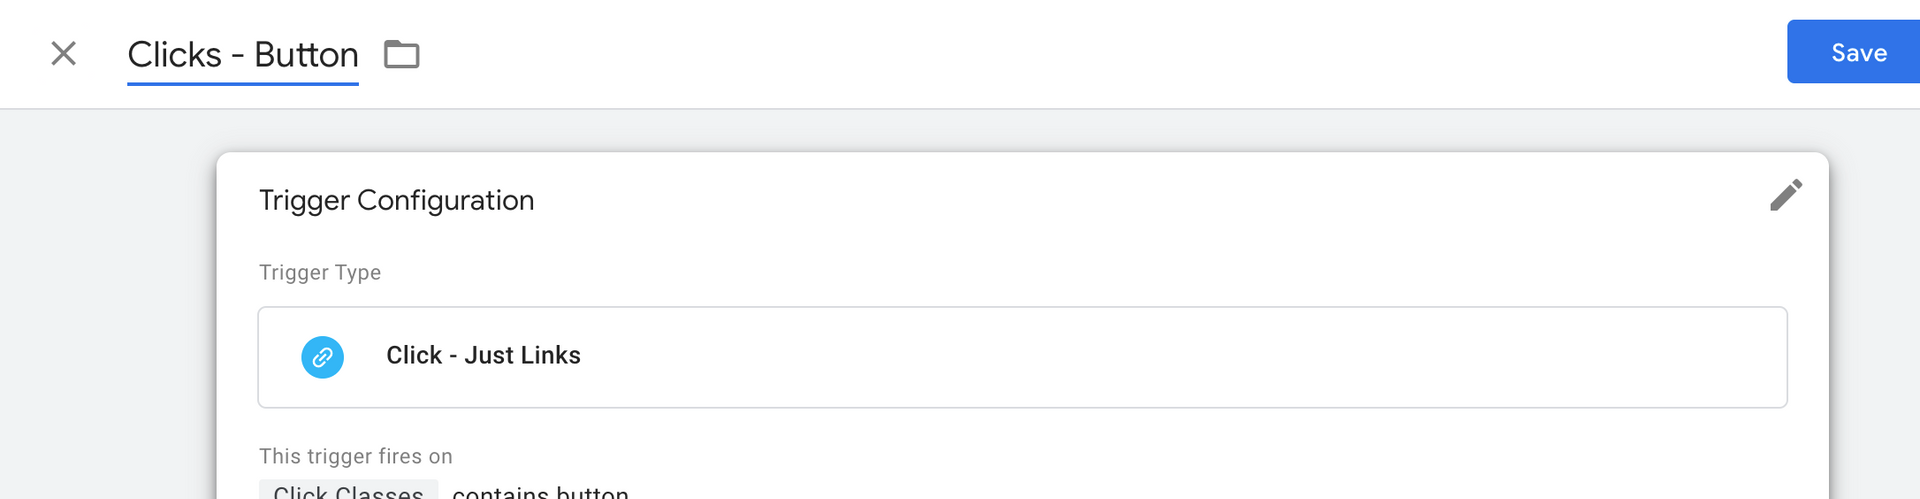
Now, just rename the Trigger to reflect that it's specifically firing when a button clicks. Here's we've named it the very creative "Clicks - Button".
Then click "Save".
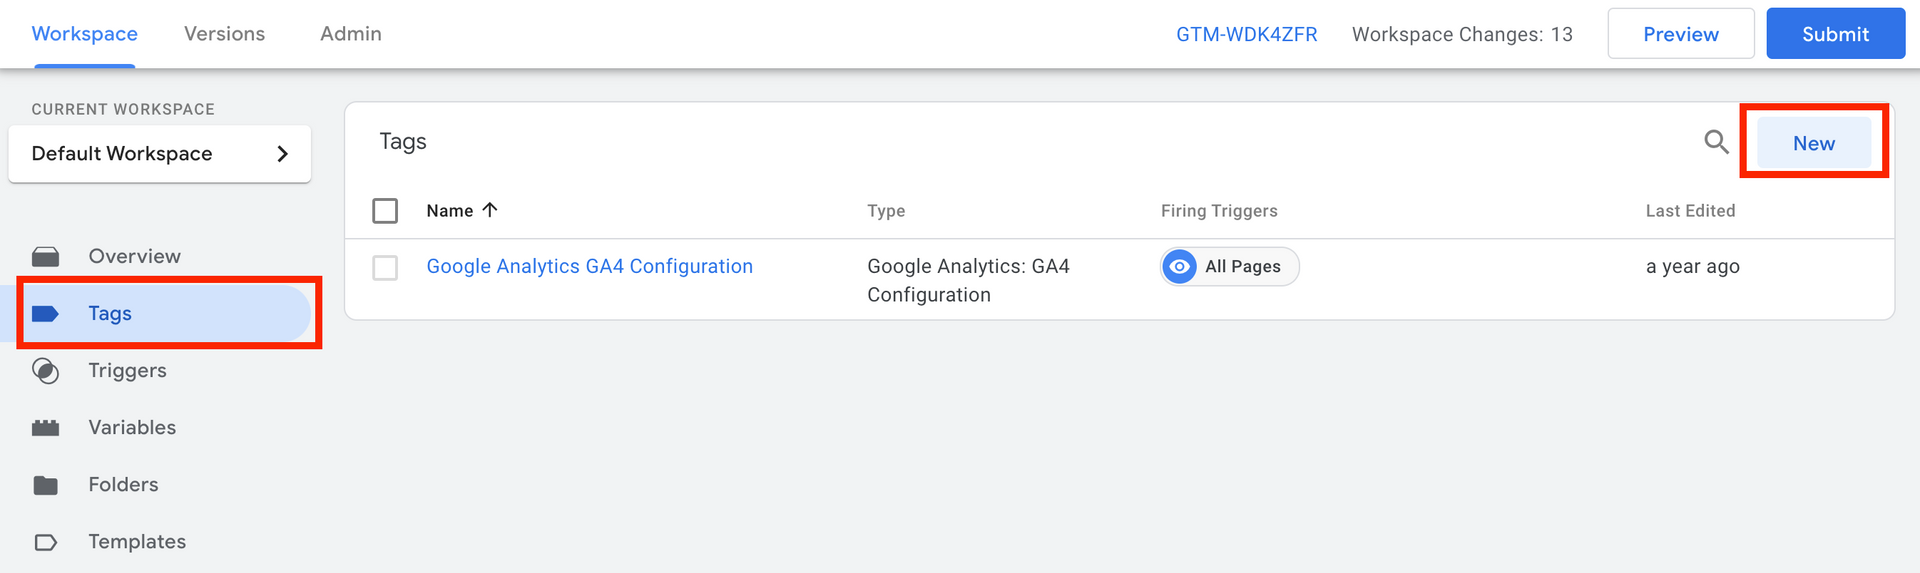
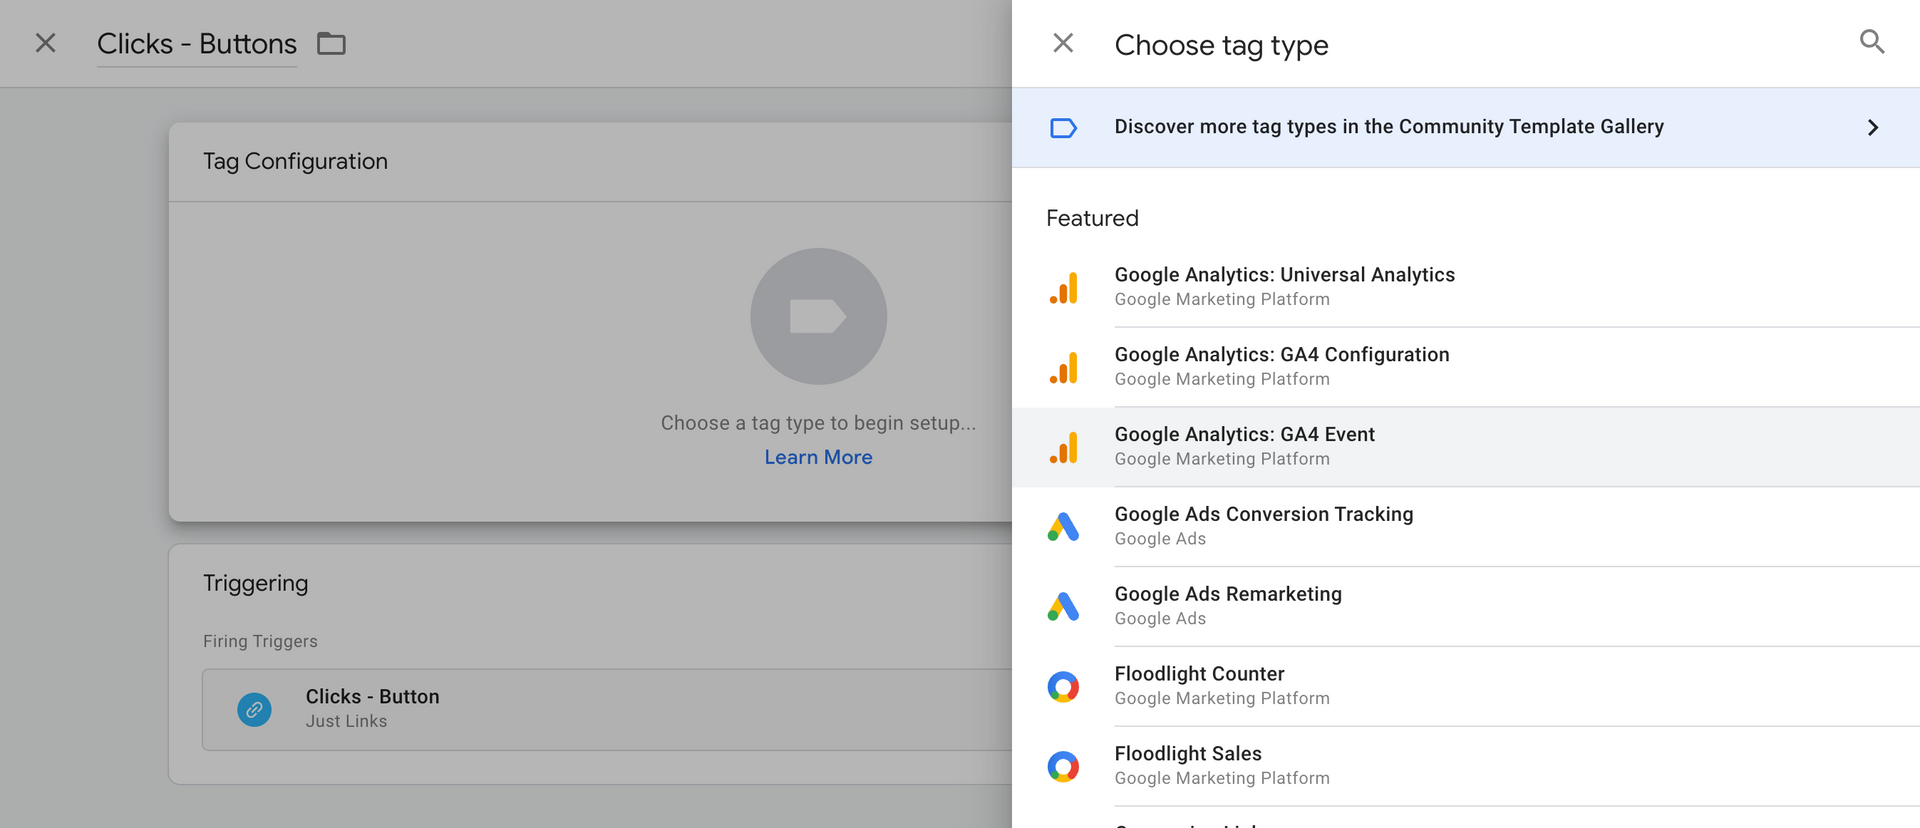
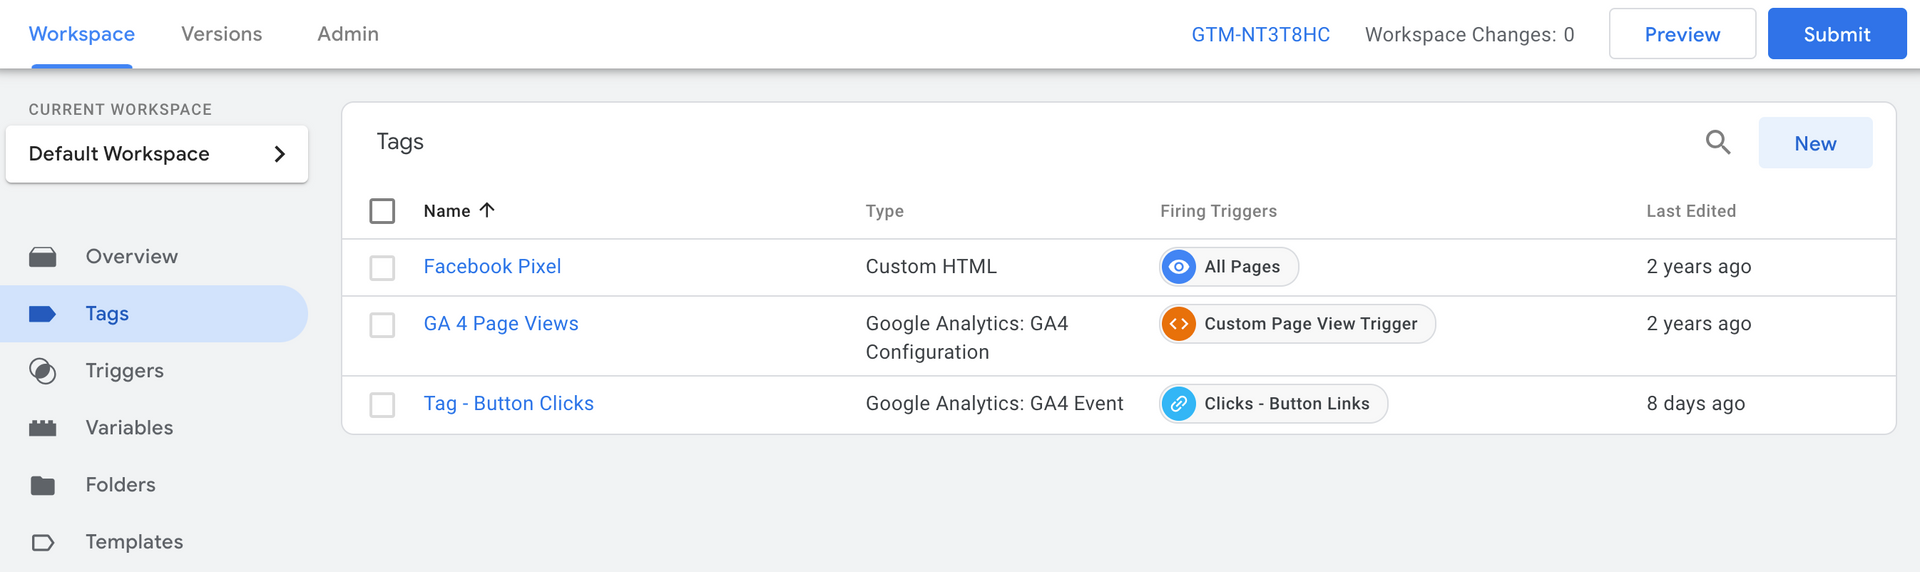
3) Create The Tag
Now that the trigger is complete, on to creating a new tag.
- Click the Tags link on the left nav.
- Click "New" on the right side.
Now that we're in the tag dialogue box:
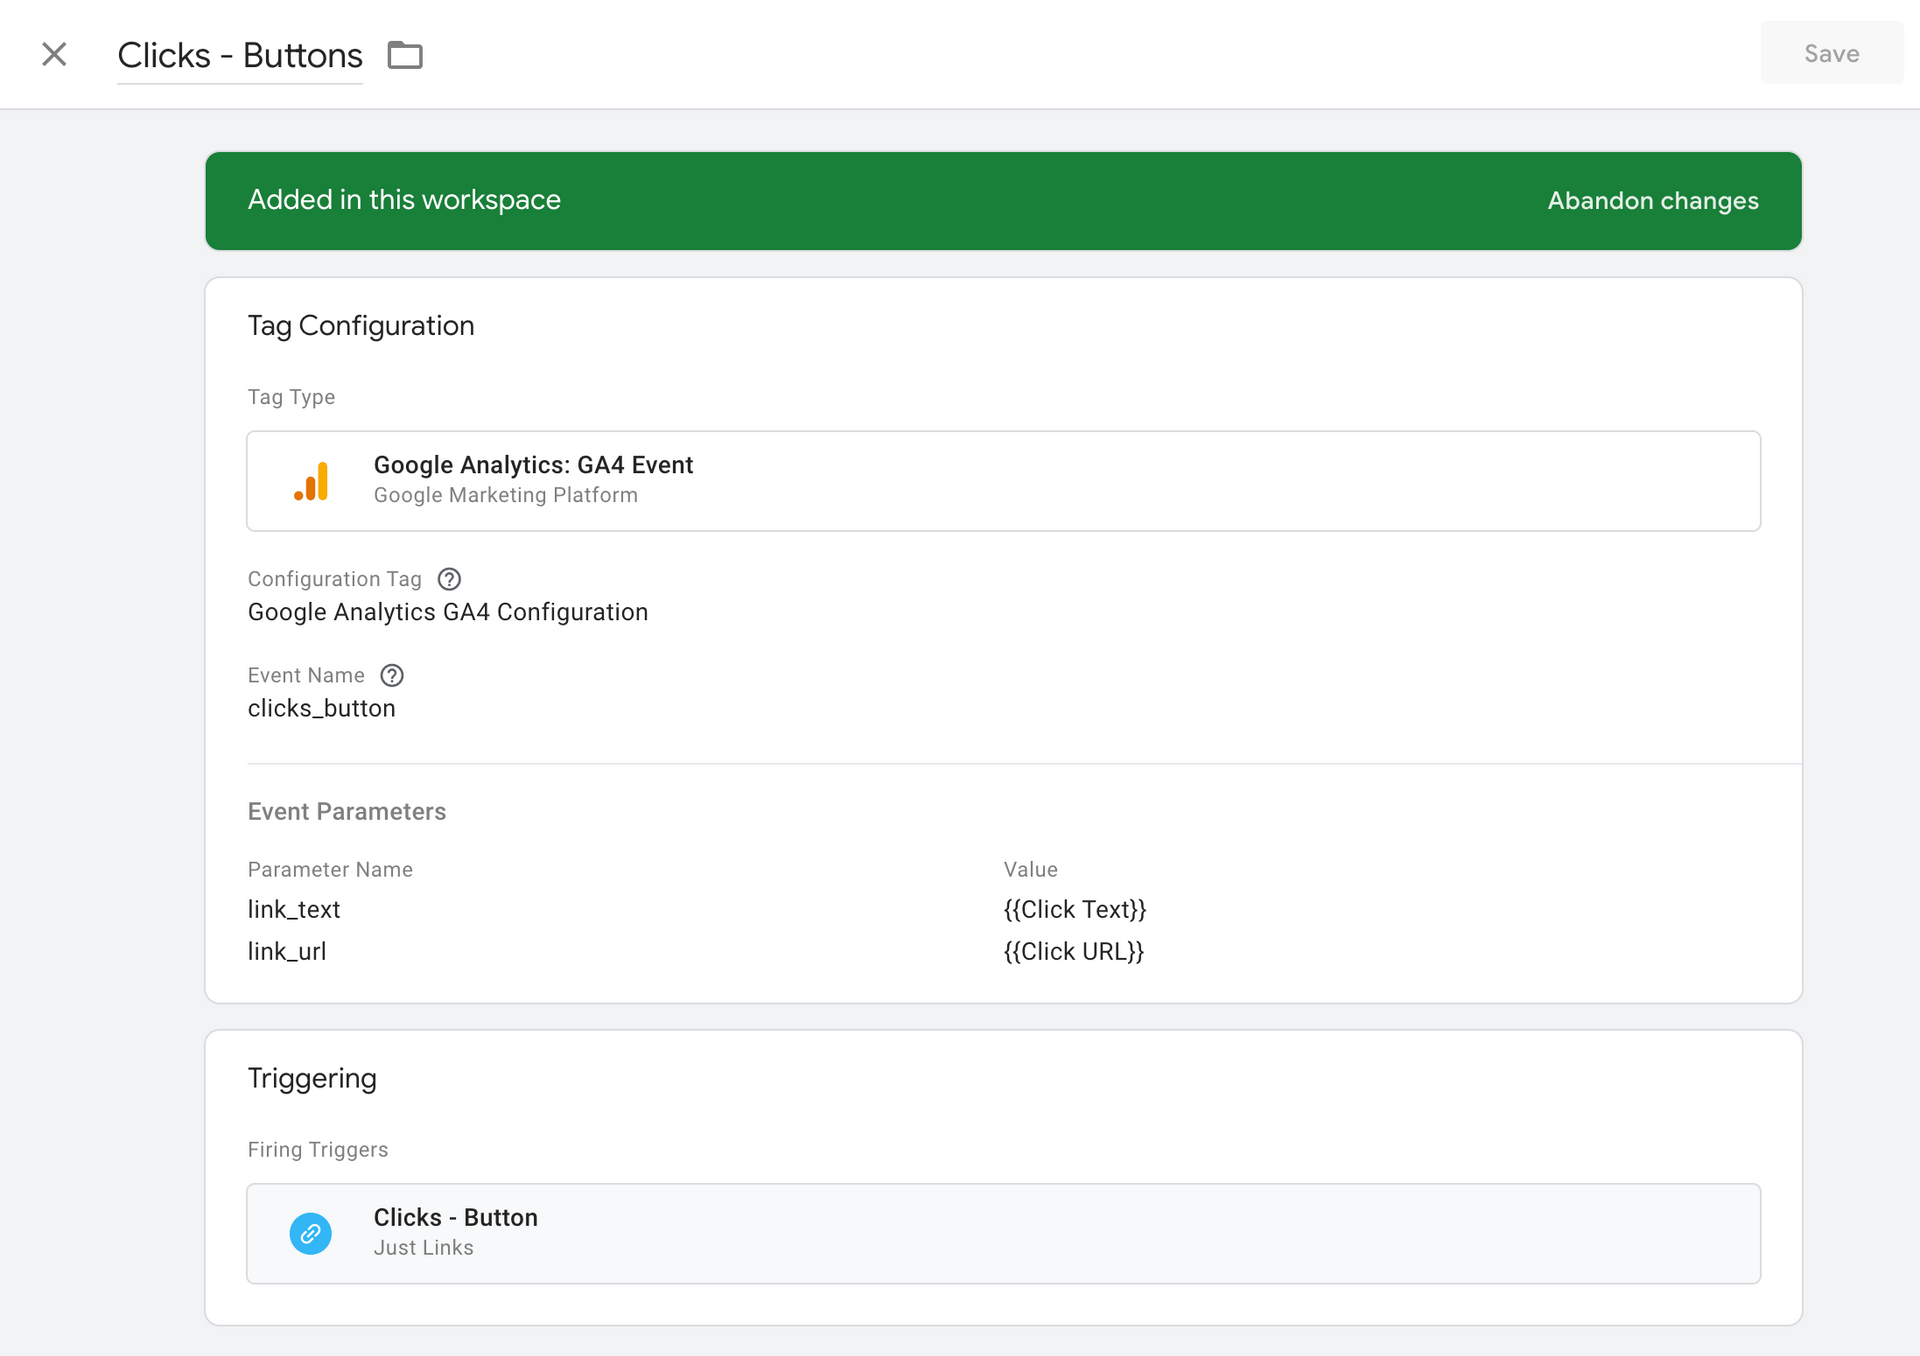
- Name the tag. We recommend using a consistent taxonomy that will help you understand the function of the tag and find it easily if you have a lot of tags to sort through. In the this case we called it "Clicks - Button", which we admit is very clever and super creative.
- Click on the Trigger field, and select the new trigger we have just set up.
Now click on the tag field and select the tag type. In this case we want a GA4 Event.
Next, you'll want to select the GA4 configuration tag, and name the event. Again, we use a consistent taxonomy, so we can easily identify events by their type and name. Keep in mind that a number of events have recommended names that Google will need if you want this data to appear in the standard GA4 reporting.
Also, it's important to note that the event names are case sensitive. Stay consistent with your capitalization, and use underscores instead of hyphens. We find it easier to use all lowercase since that is what Google's event names use.
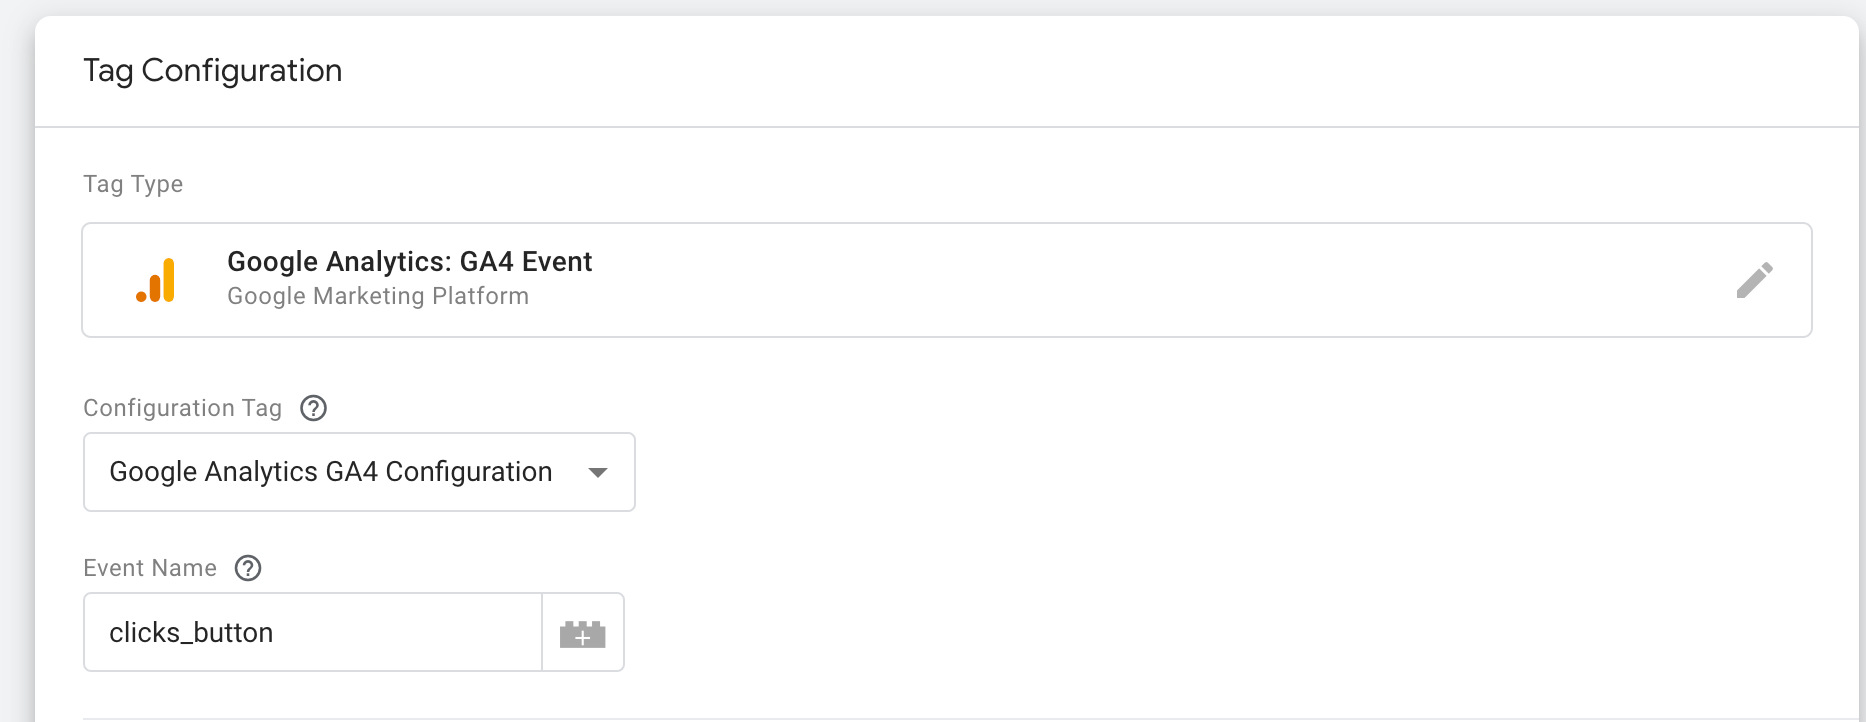
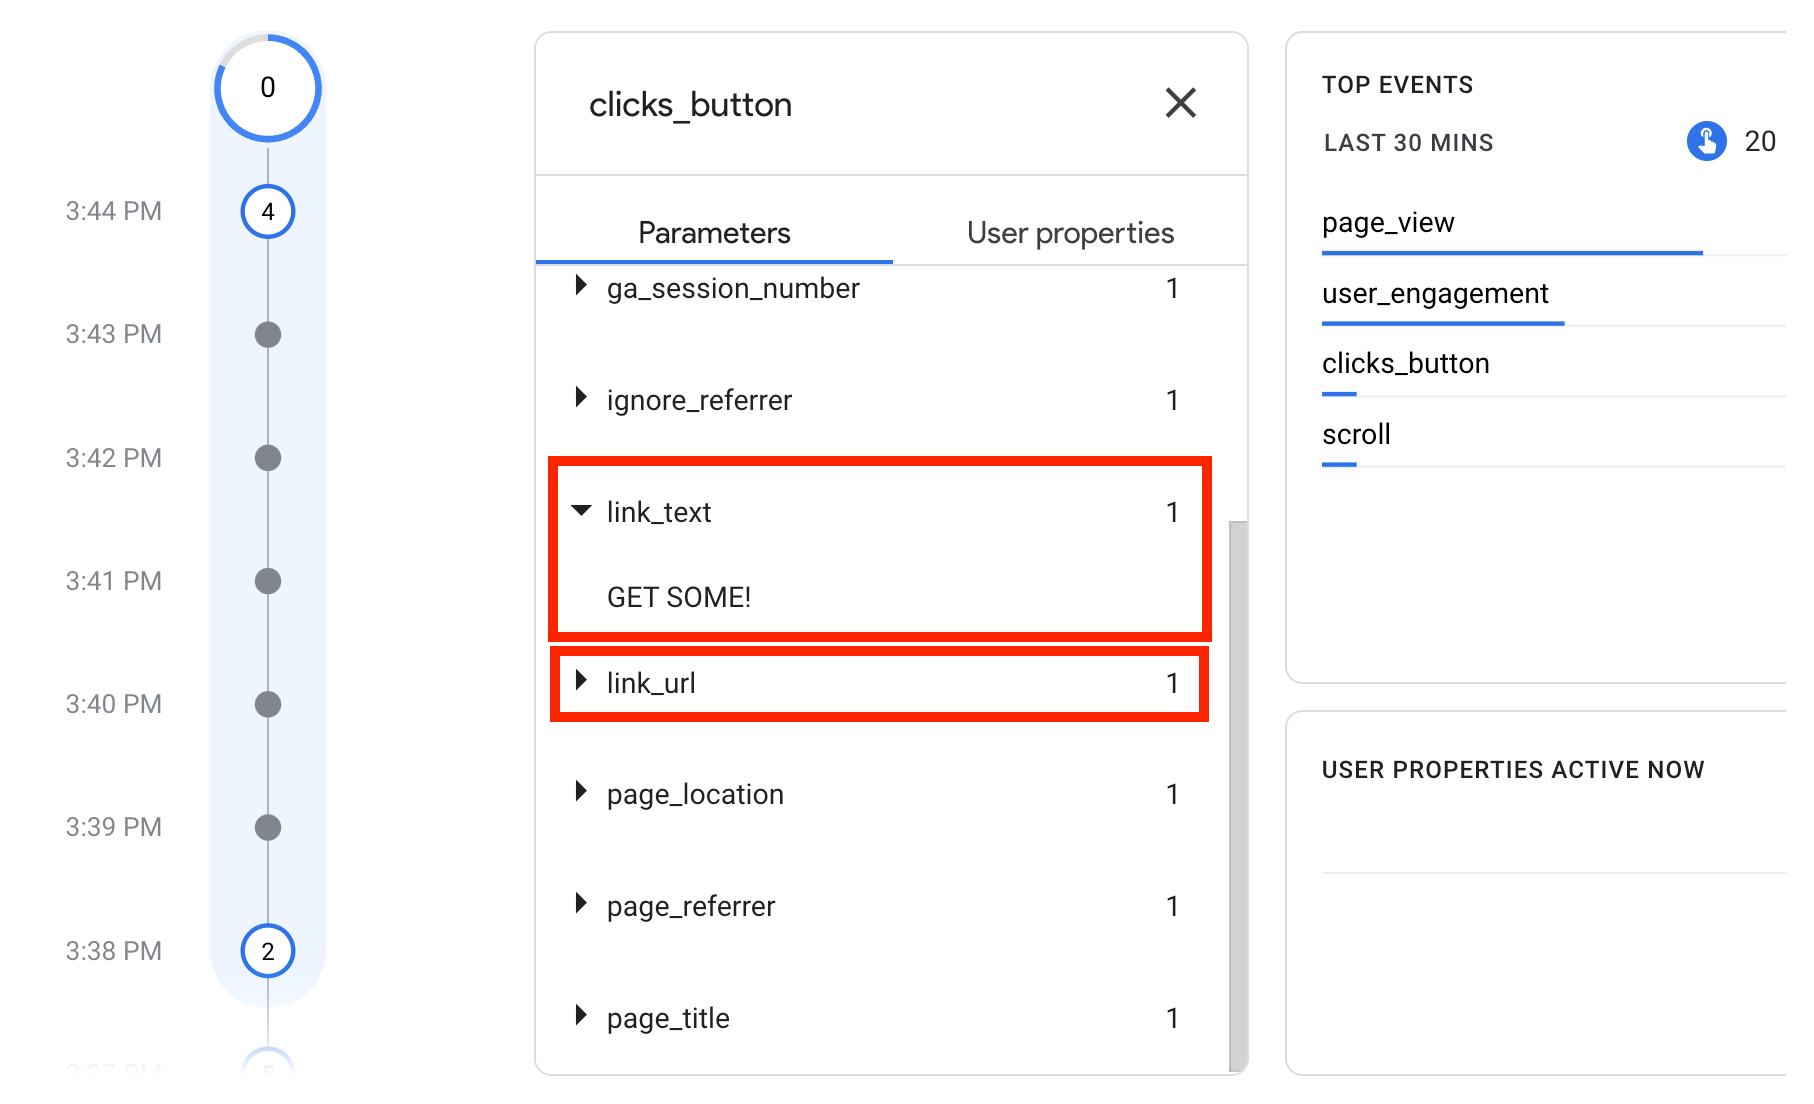
Events can pass parameters as well. In this case, we'll want to know what text was contained in the button, as well as what the URL was. This will help us to identify the clicks.
This is a case where Google recommends the syntax of the parameters that we're using: "link_text" and "link_url". They also have predetermined variables. Just click on the "lego" block, and select Click Text and Click URL respectively.

Save your new tag.
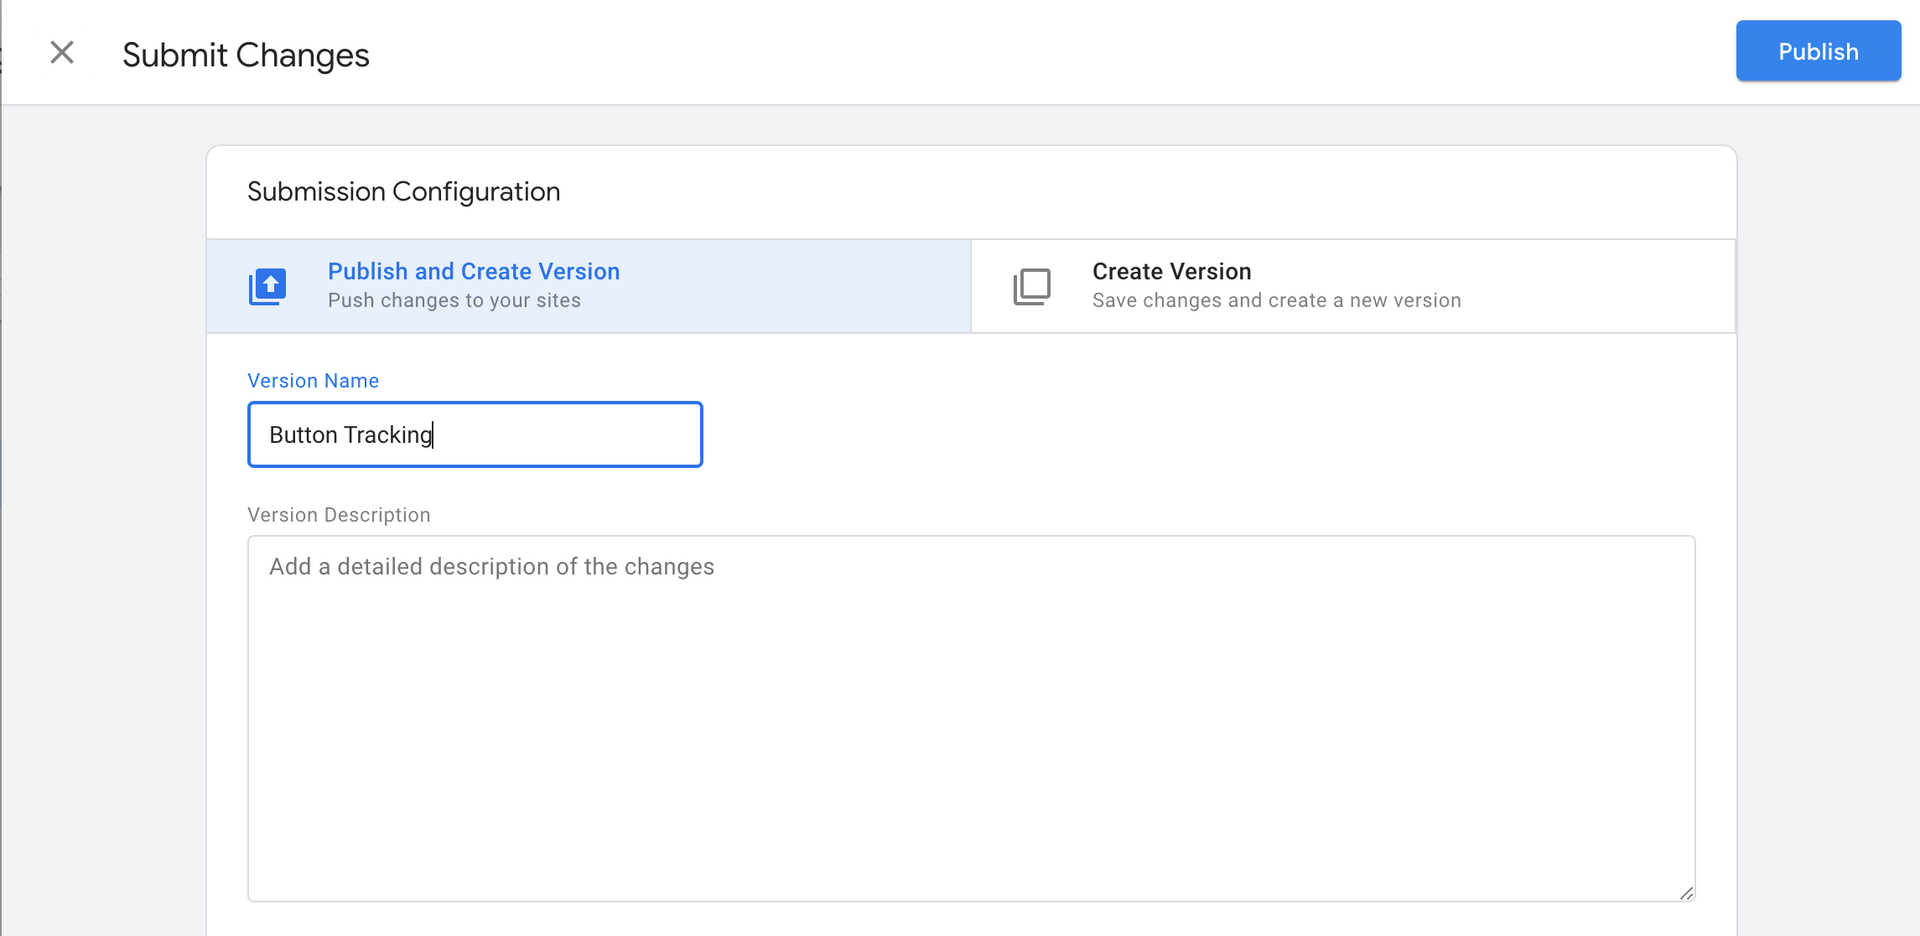
4) Publish Your Changes
Once you save your new tag, it's time to publish it to your site.
- Click on the Publish button.
- Add information about what you're publishing. This way you and others will know what was implemented and when.
5) Test Your Tag
Once your tag has been published, it's time to test it to make sure that it is being fired correctly. You have two options to do this:
Use the tag assistant like we did when we created the "All Clicks" trigger. In this case you'll launch the assistant, click on a button on the site, and make sure the tag is firing in the assistant.
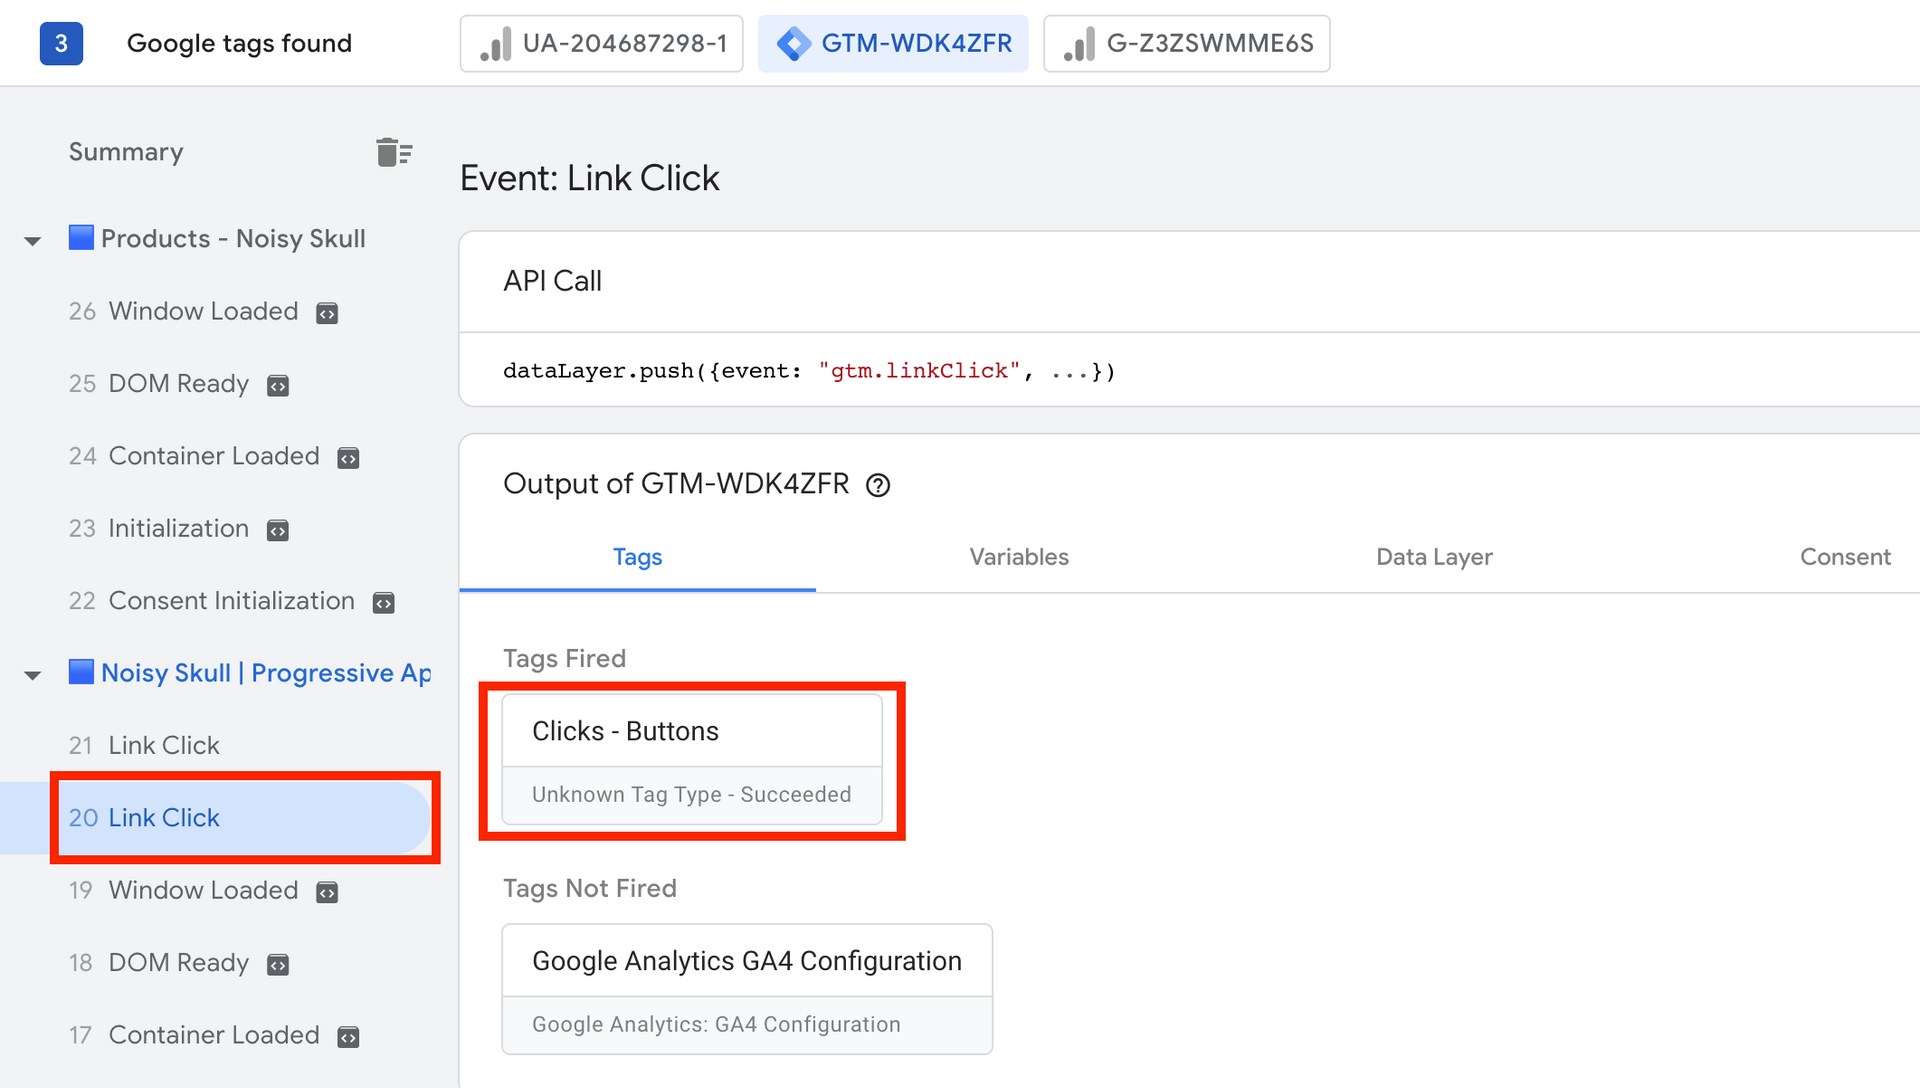
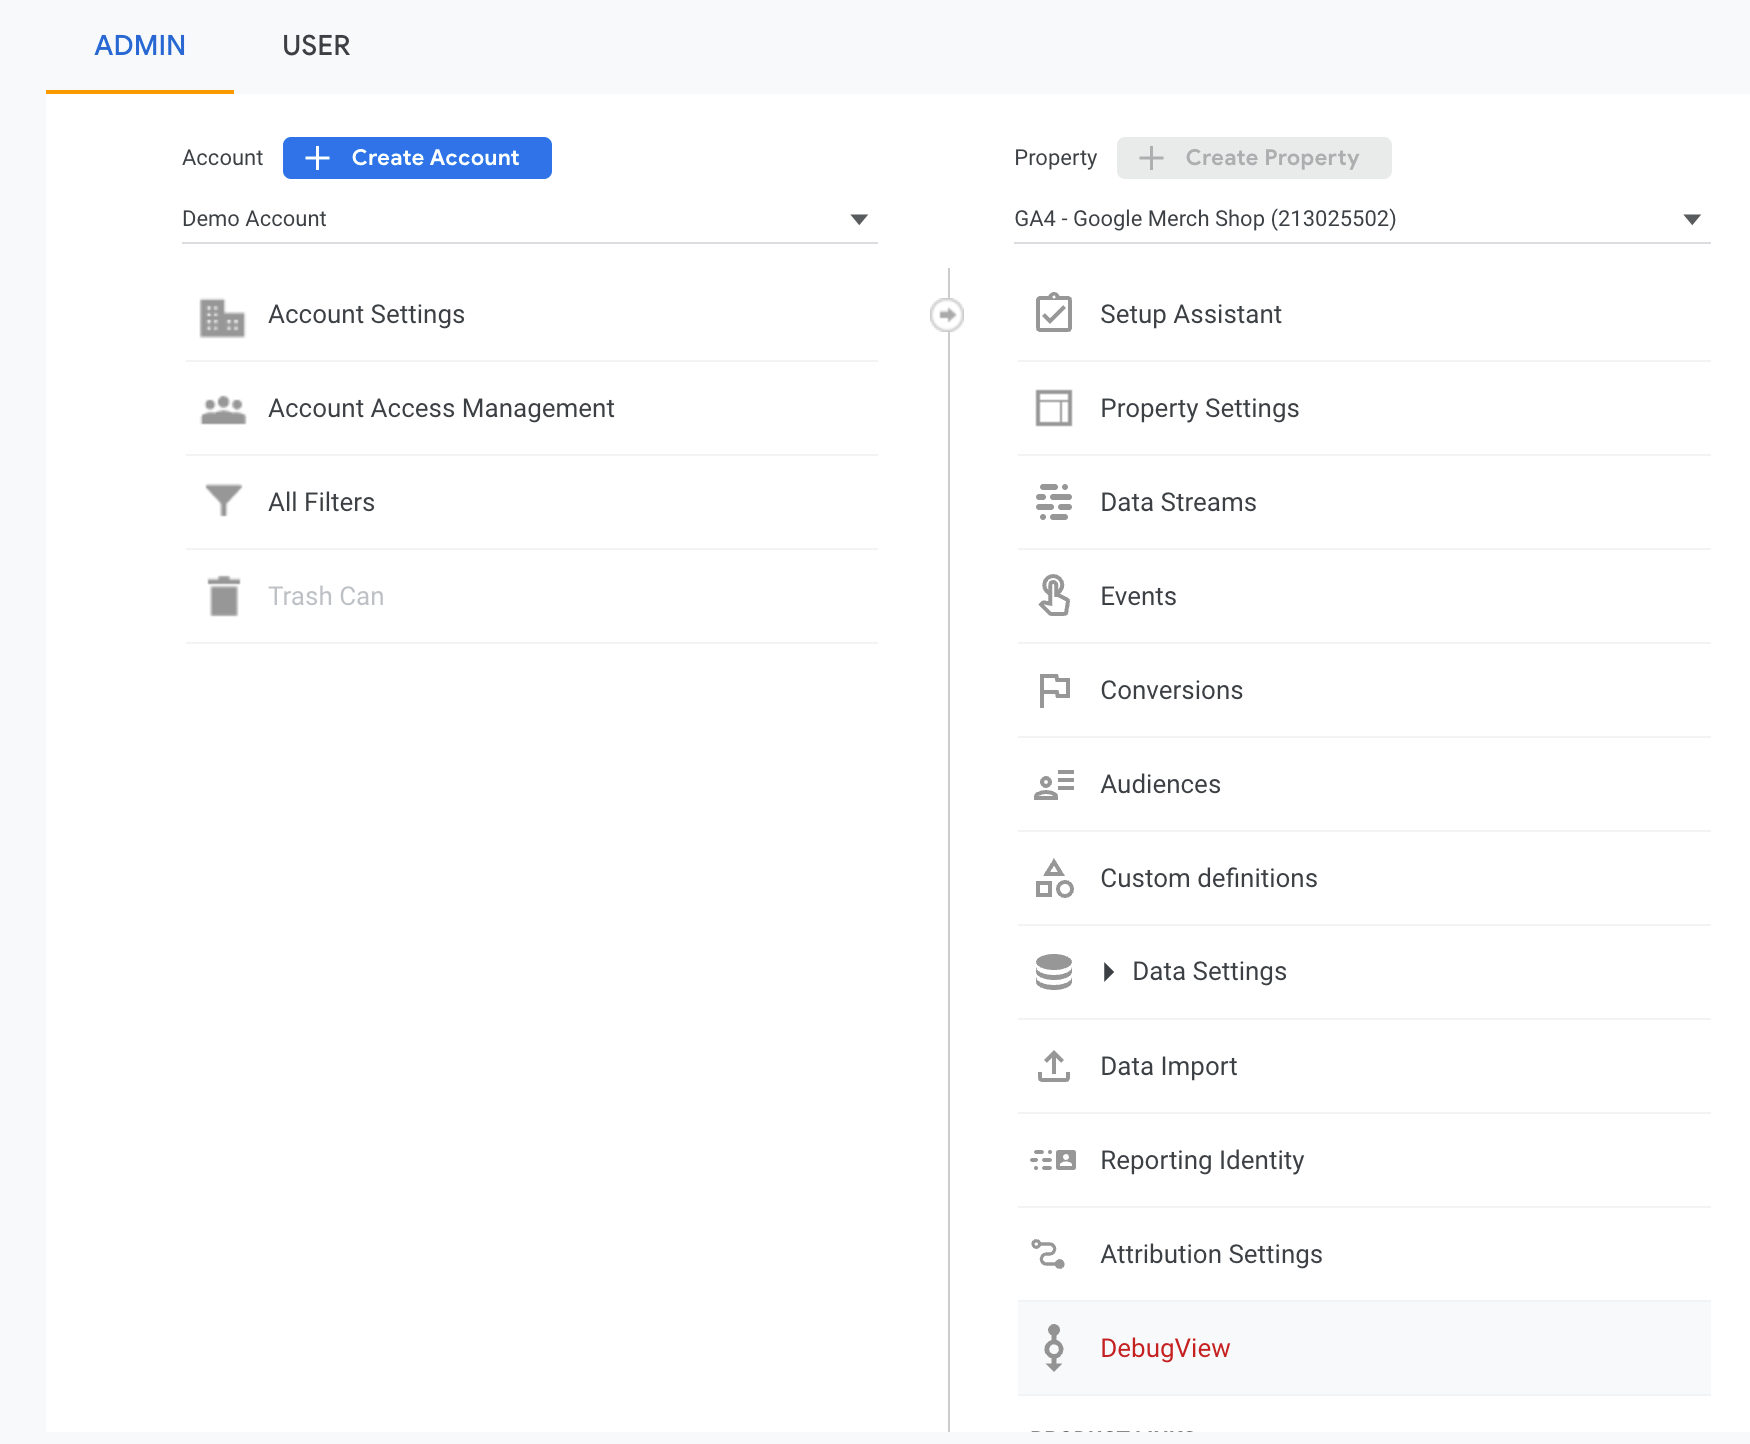
You can also head over to GA4's admin and click on Debug View. This will show you close to real-time events occurring on the site.
If you've clicked on your button, and the tag is firing correctly, you should see the event show in the timeline.
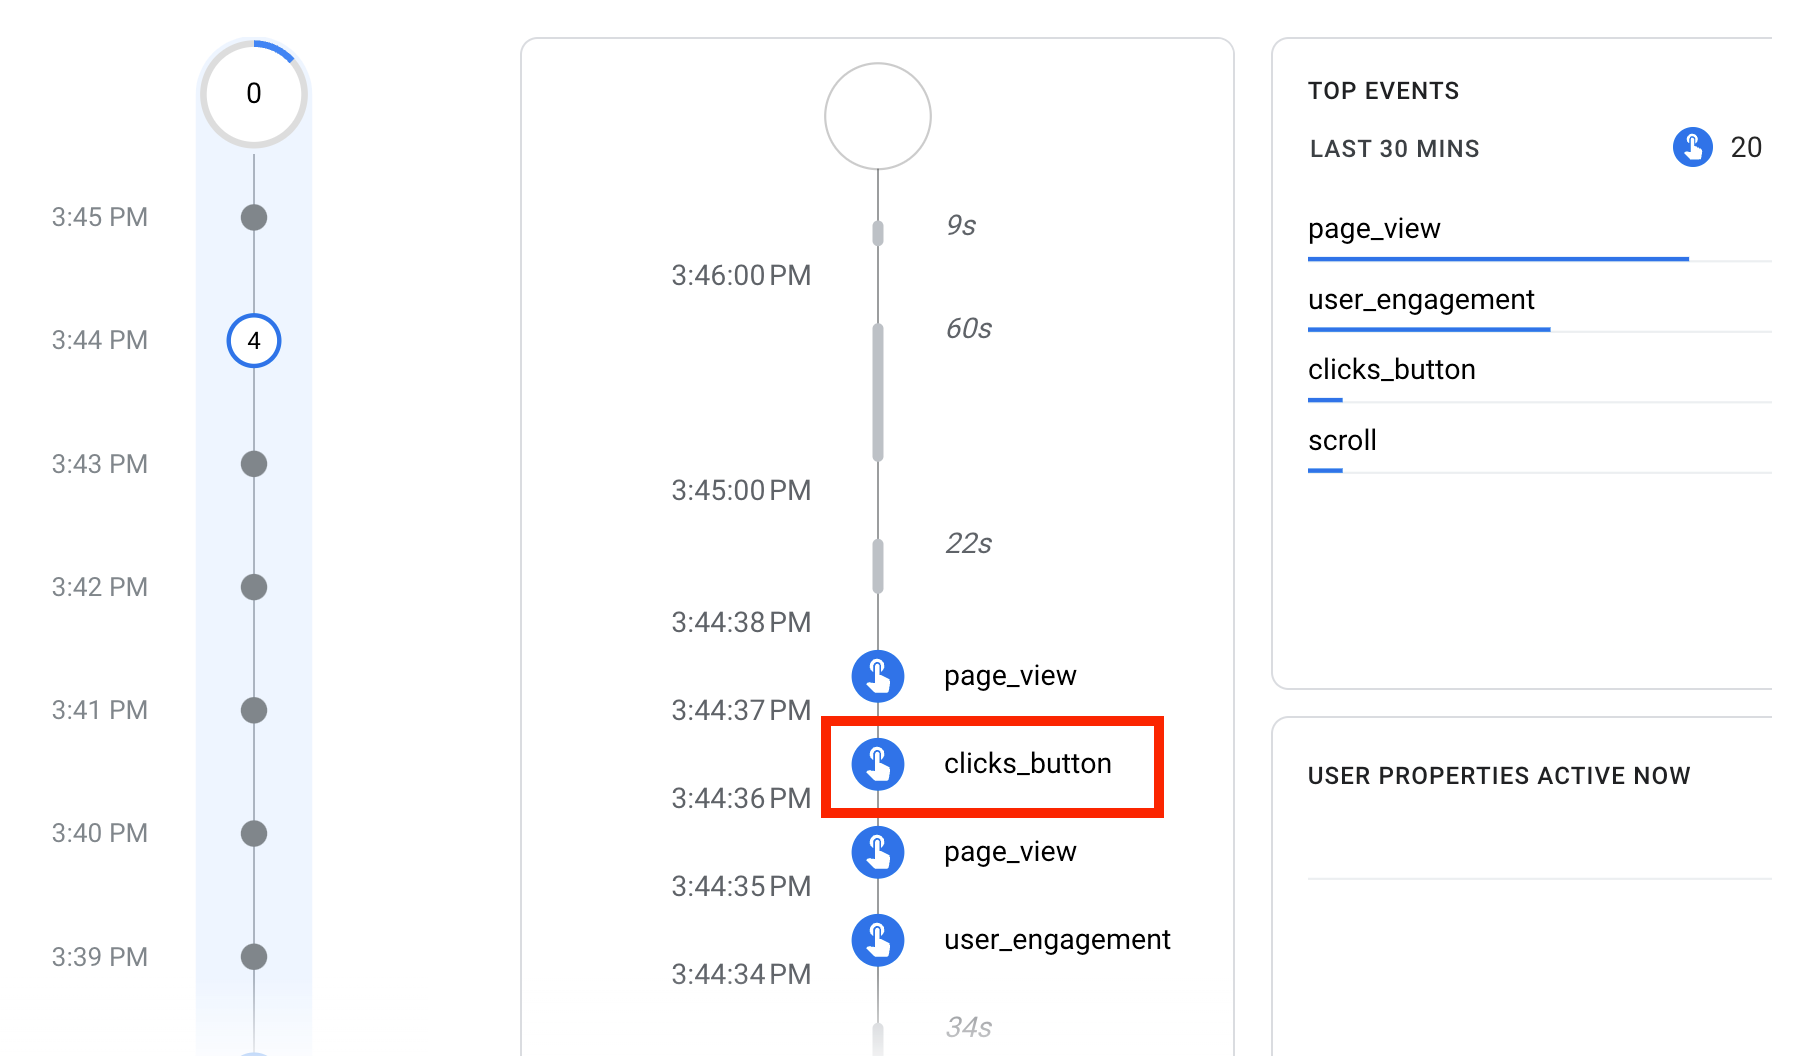
Next, click on that event to see if your parameters are being passed correctly.
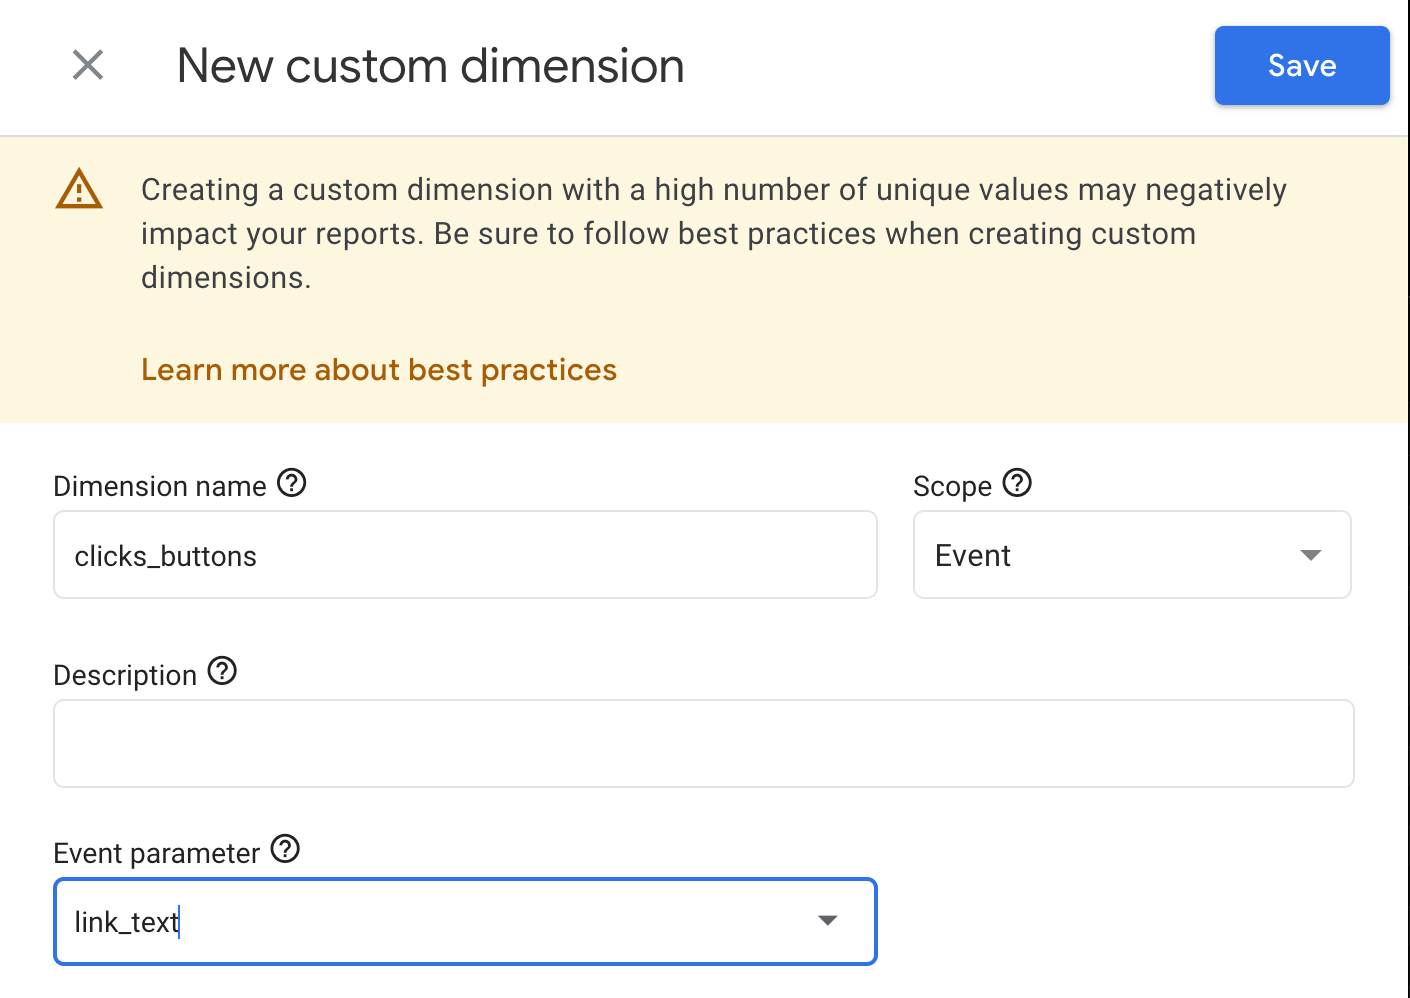
6) Add Custom Dimension
In order to see your new event and parameters in your GA4 dashboards, you will need to add them as a Custom Dimension.
In order to do this:
- Head to your GA4 Admin
- Click on Custom Dimensions
- Click on the "Create custom dimensions button"
- The add your new event and parameter information. Remember that this needs to exactly match what you entered in Google Tag Manager, so you'll want to check spelling, capitalization, etc.
- Then click Save.

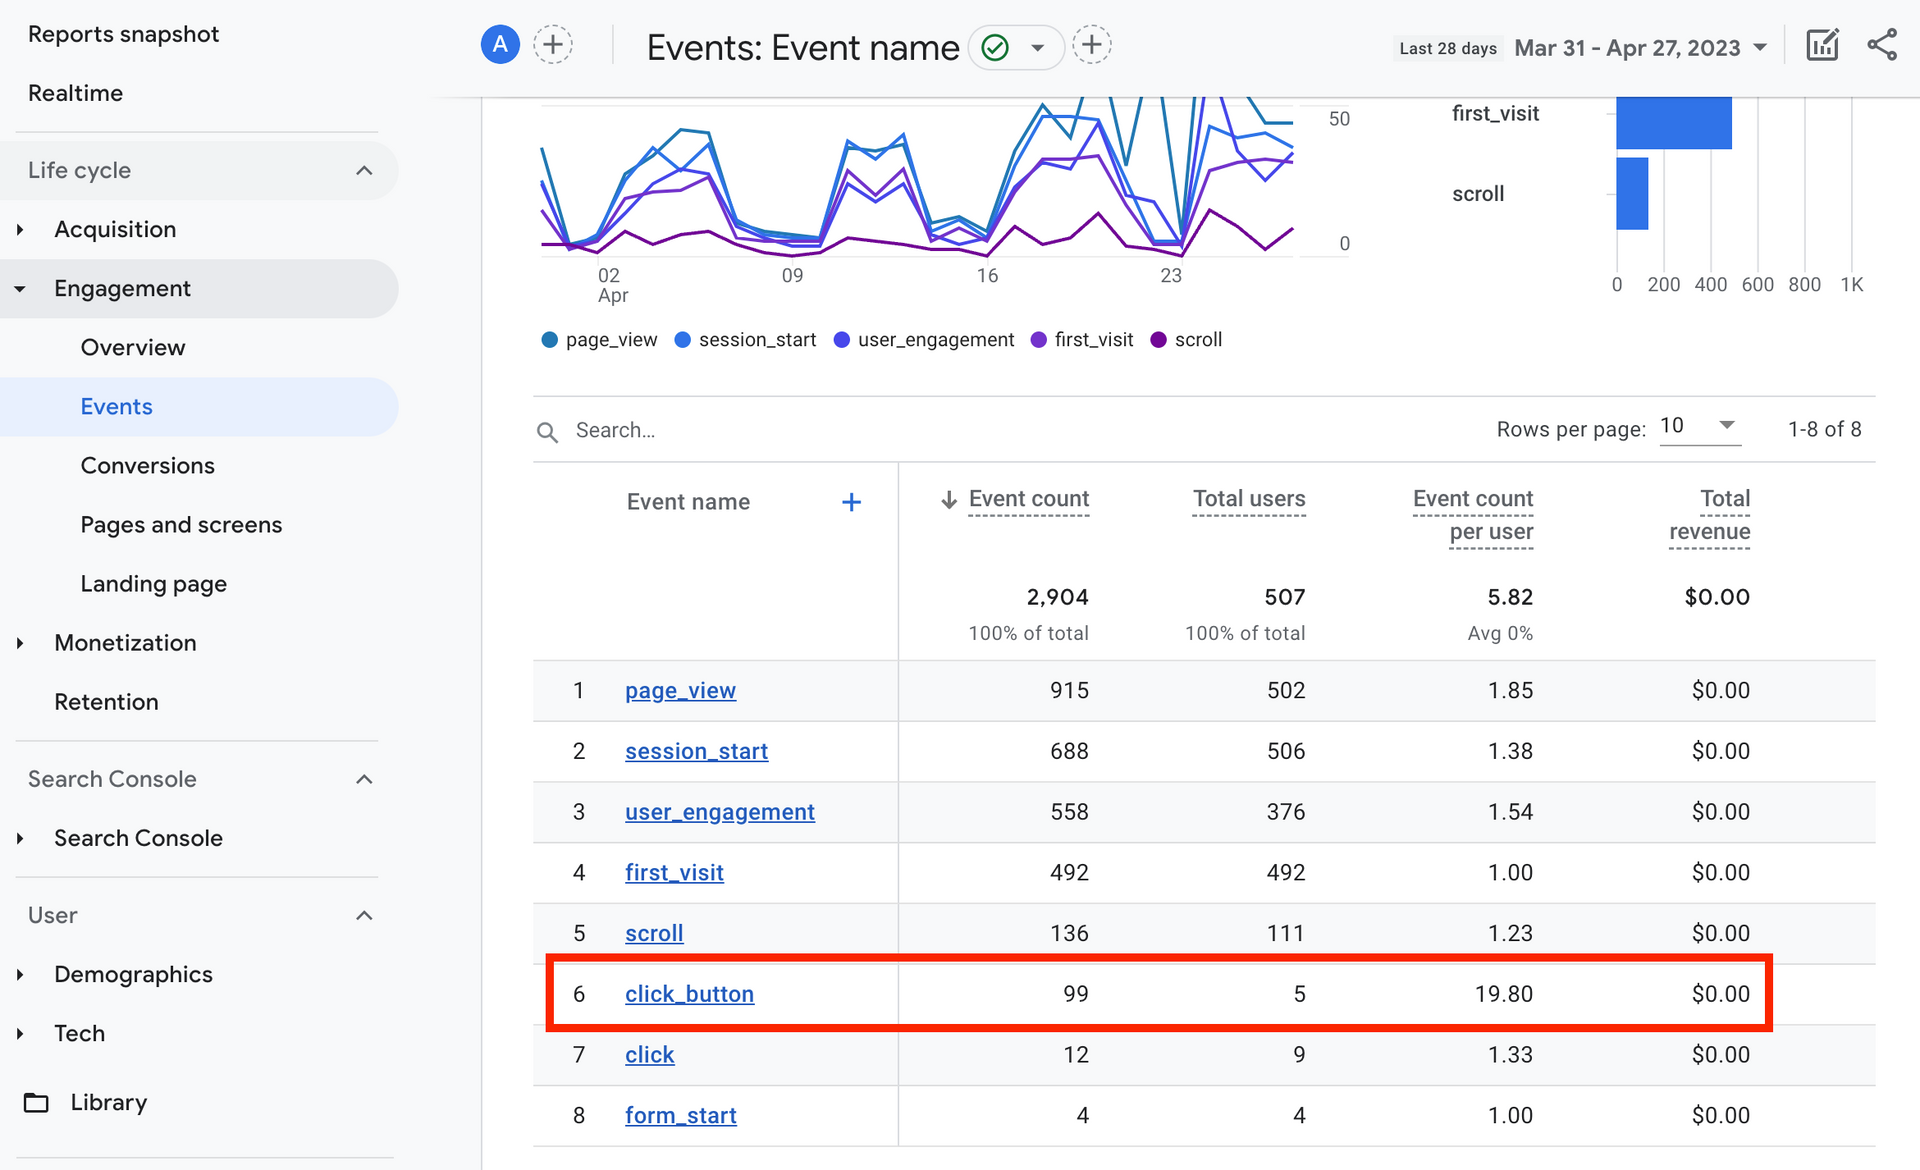
7) See the Data? Nope, You Have to Wait.
You want to go see your data right away, right? Well, sorry. As with most changes in GA4, you'll need to wait at least 24 hours before you start seeing data for this new event. And it will only show data going forward, since it's not retroactive.
But, once it does start showing, you should this in your events report. If you click on the new event name, you'll see a new report with the the data for this event. The data will be accessible via Explore reports and in Looker Studio.
The Video

Contact Us